Managing Information Directories
Element Directories
Directories are stored text that the user can edit. This section will show you how to access and edit element directories in cityEHR.
-
Navigate to the Admin screen of your chosen application. For this example, we will use Elfin 2.
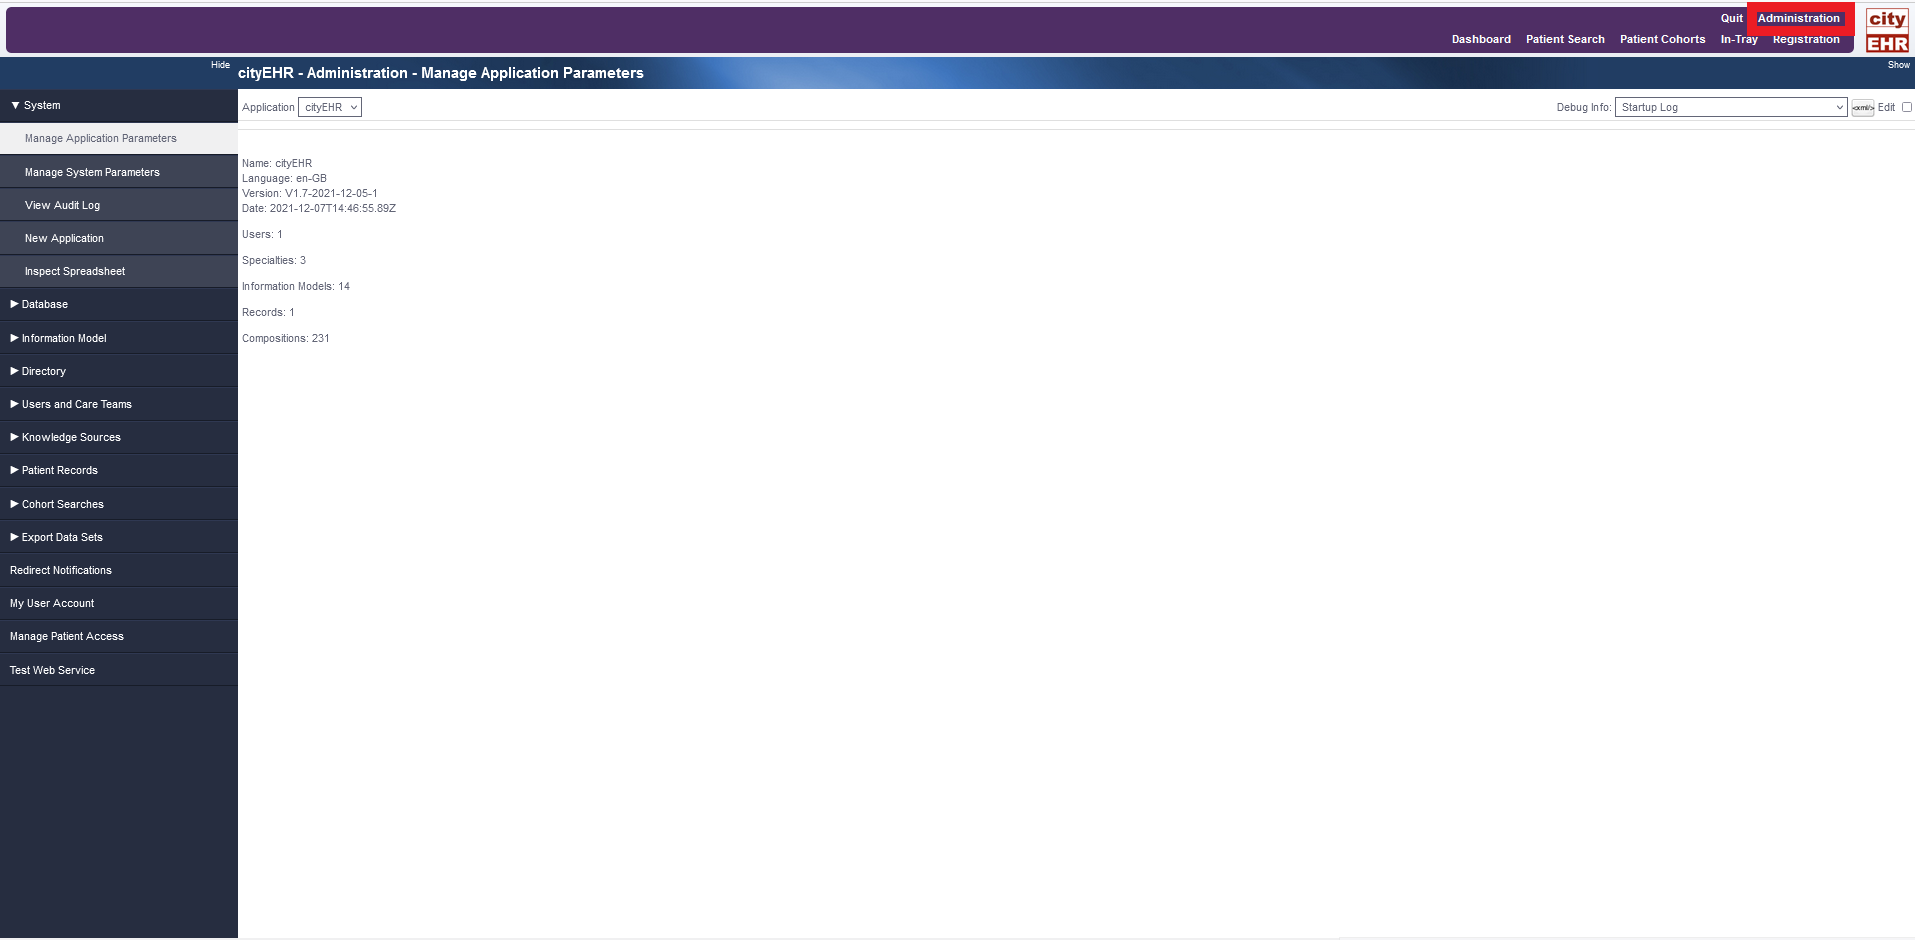
Manage application parameters within administration -
Navigate to the “Directory” menu on the left of the screen.
-
Click on “Manage Directory”

Manage Directory administration page -
Ensure that the correct Speciality and Directory Type are selected. For this exercise, it should be set at Elfin2 and Element, respectively.
-
In the “Directory” dropdown list at the top right of the screen, select the directory you wish to edit or add to. For this example, we have selected “Adverse Effects” as our Element Directory.

Selecting the desired directory from the dropdown list -
You can add or edit this directory by clicking on the “+” sign at the top left of the directory or by editing the text boxes.

Editing the directory -
Click the icon “Rebuild Directory” at the top left of the Manage Directory form to save and rebuild the directories into your application.

Rebuilding the directory -
Navigate to the screen that contains this directory (form, letter, etc.) and view your changes
Entry Directories
-
Entry Directories work like Element Directories, but for Entries. You can edit Entry Directories the same way as Element Directories. To do this, navigate to Manage Directory and then Select “entry” in the Element Type drop down.
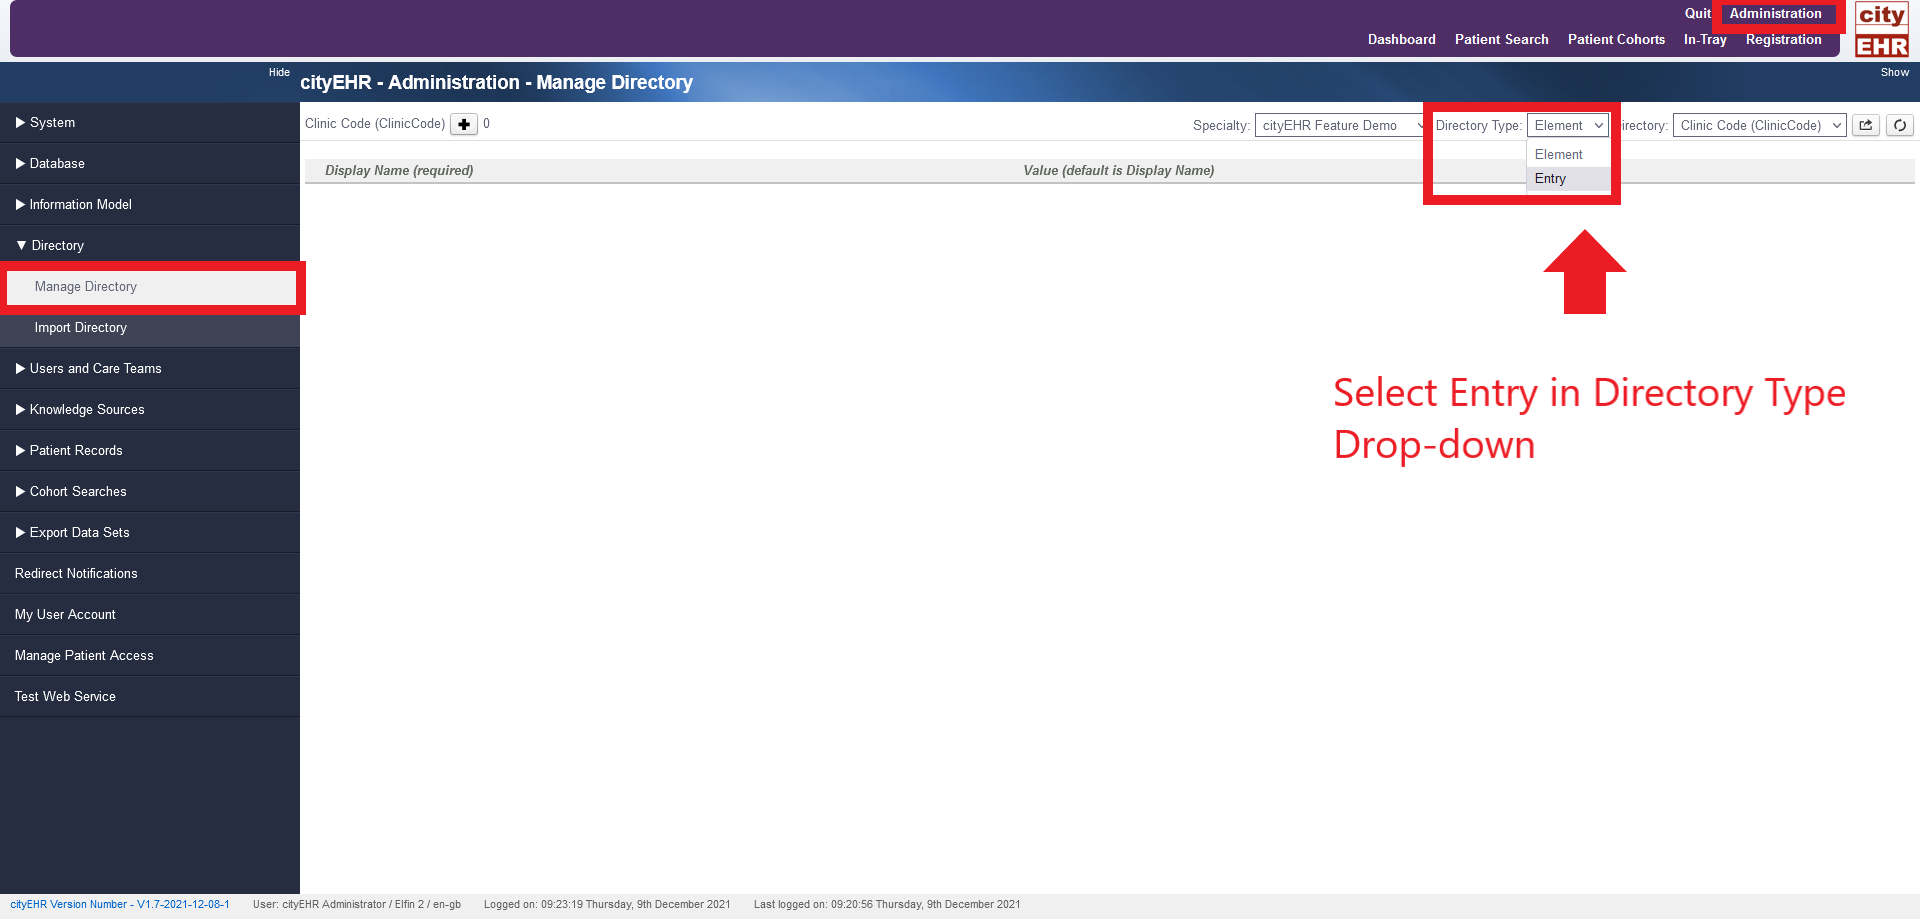
Selecting the type of directory -
Select the Name of the Directory you want to modify.
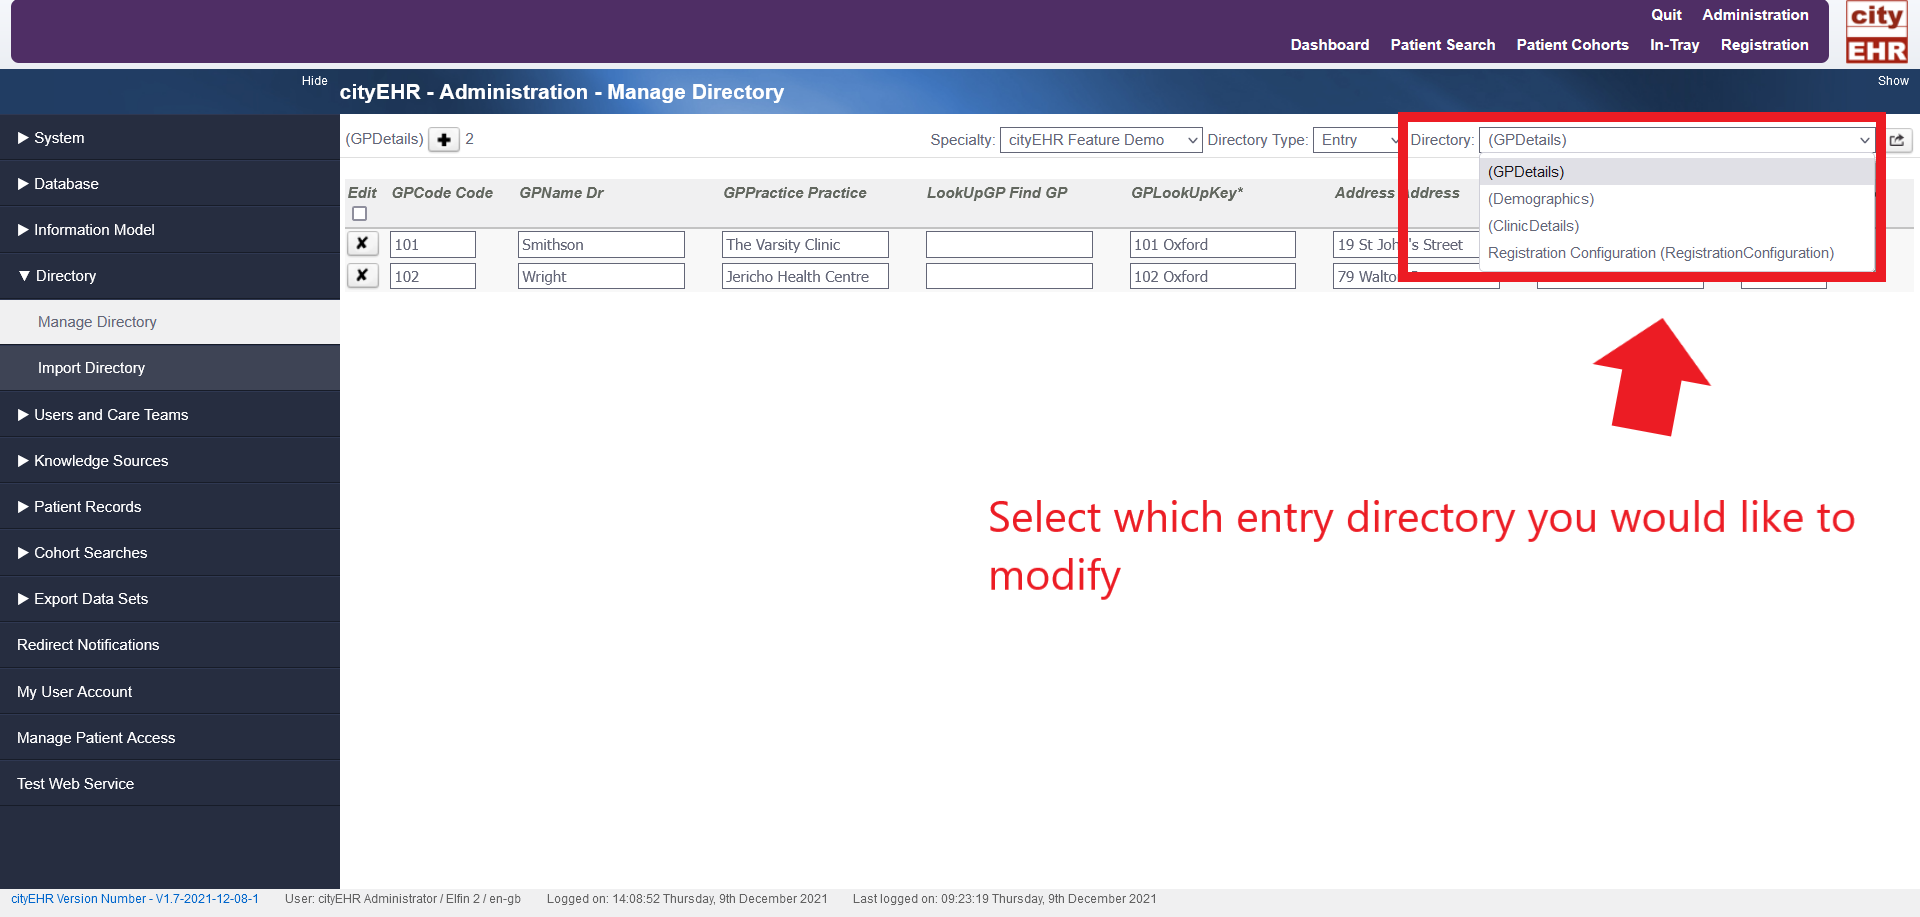
Selecting the directory to modify -
You can make changes in the existing directories or add new ones.
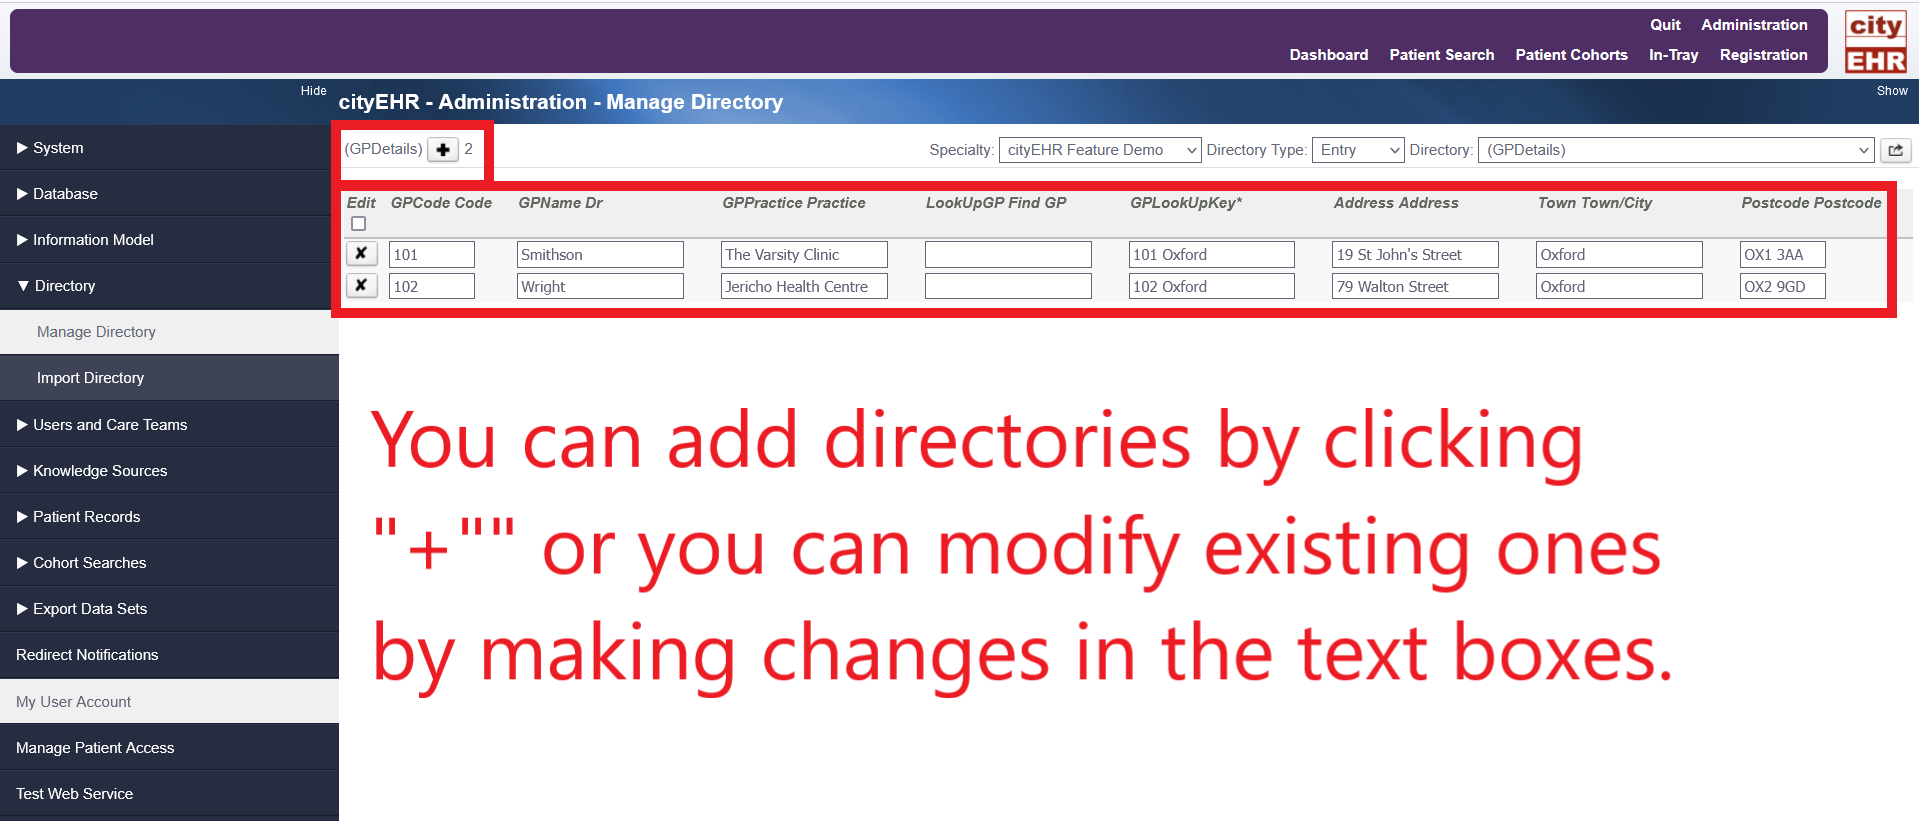
Adding directories or modifying existing ones
Importing Directories
-
To import a directory, first navigate to the Administration page, and then to Directory in the menu on the left.
-
Now Navigate to “Import Directories” under “Directory”.
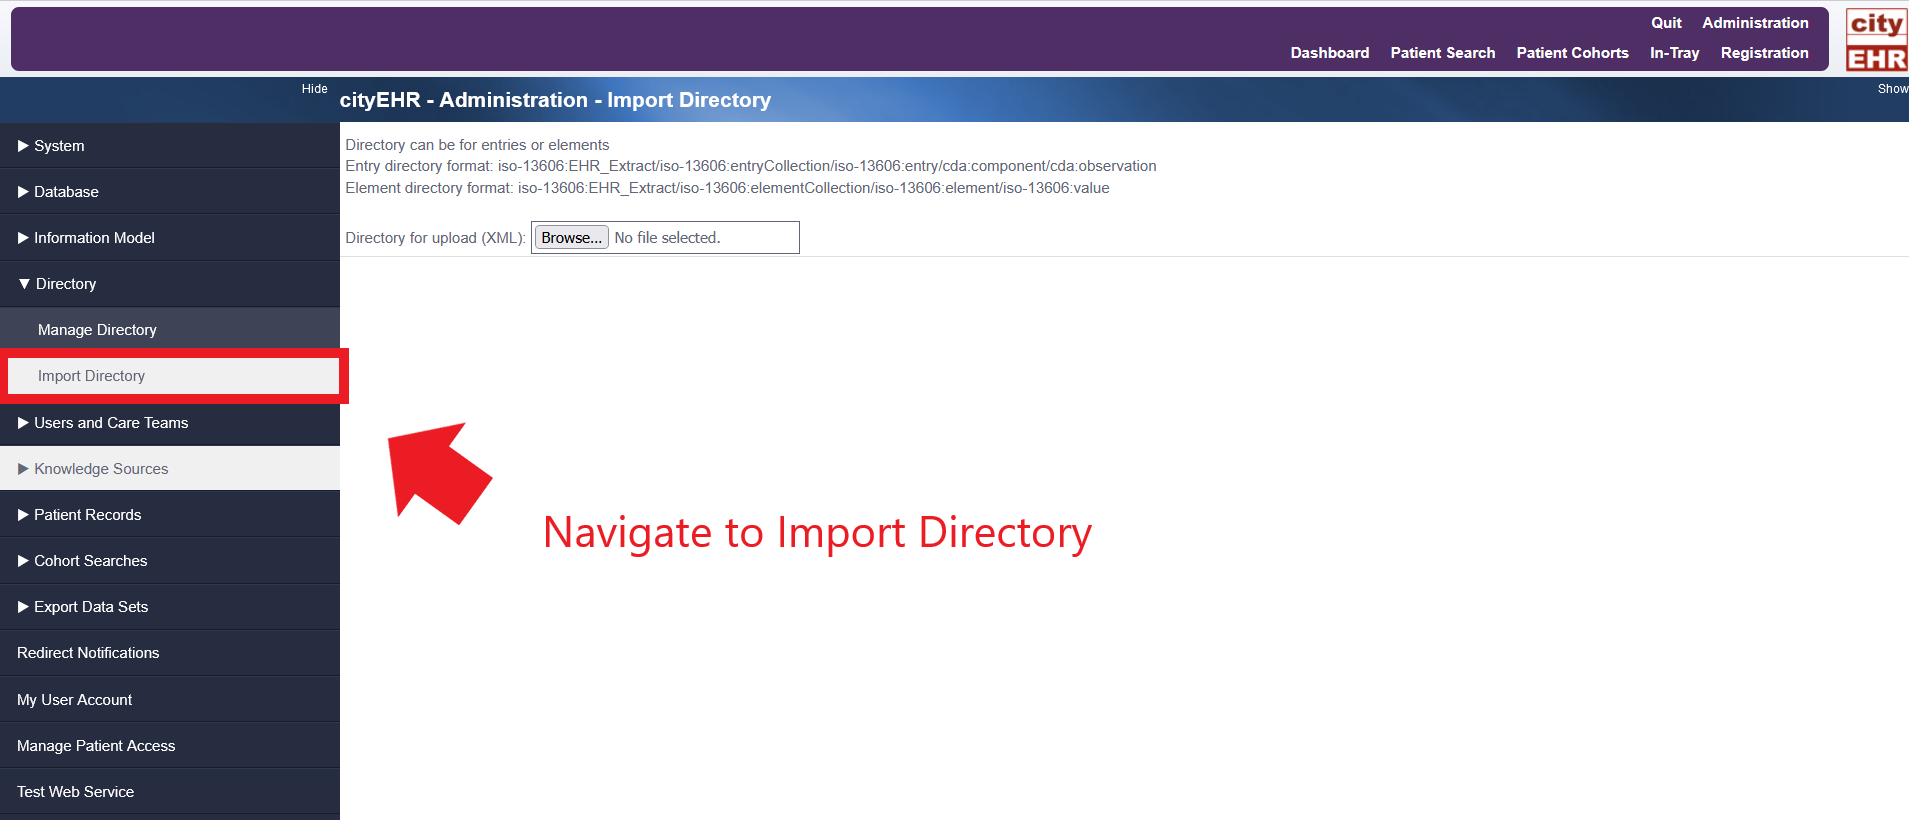
Import directory page -
Click the “Browse” button in the display window and navigate to the folder shown in the image below.
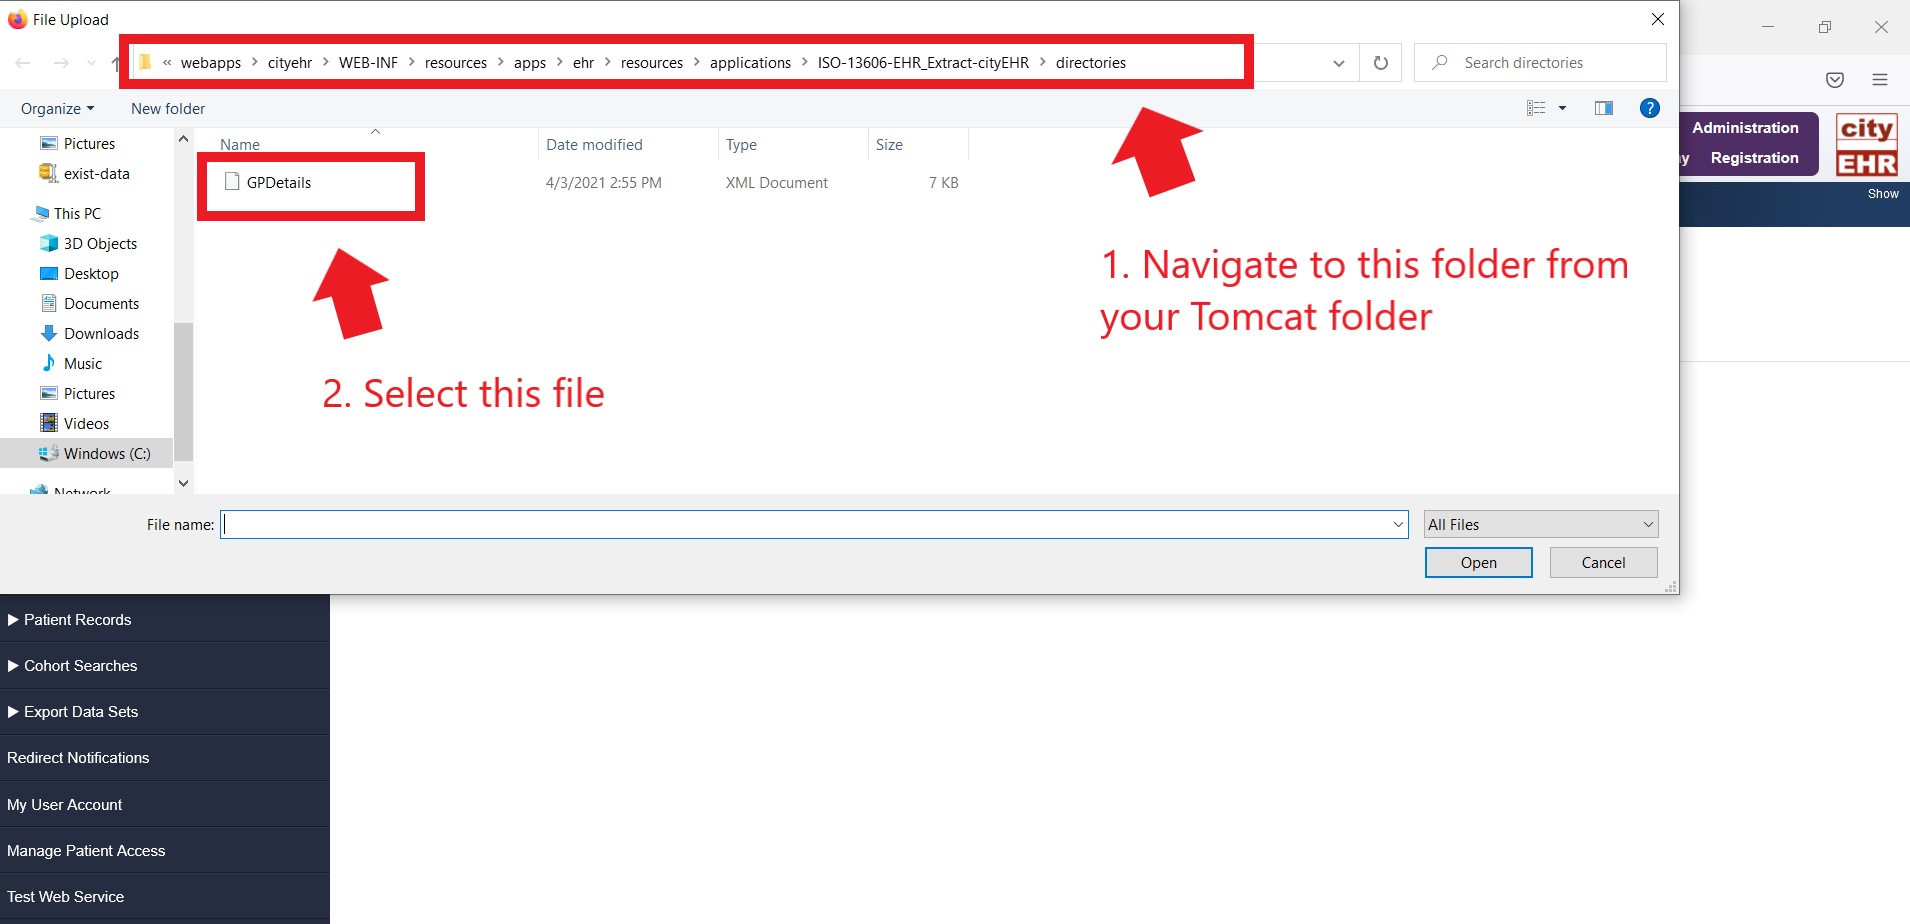
Selecting GP details file for import -
Select the file “GP Details”.
-
Click the import button.
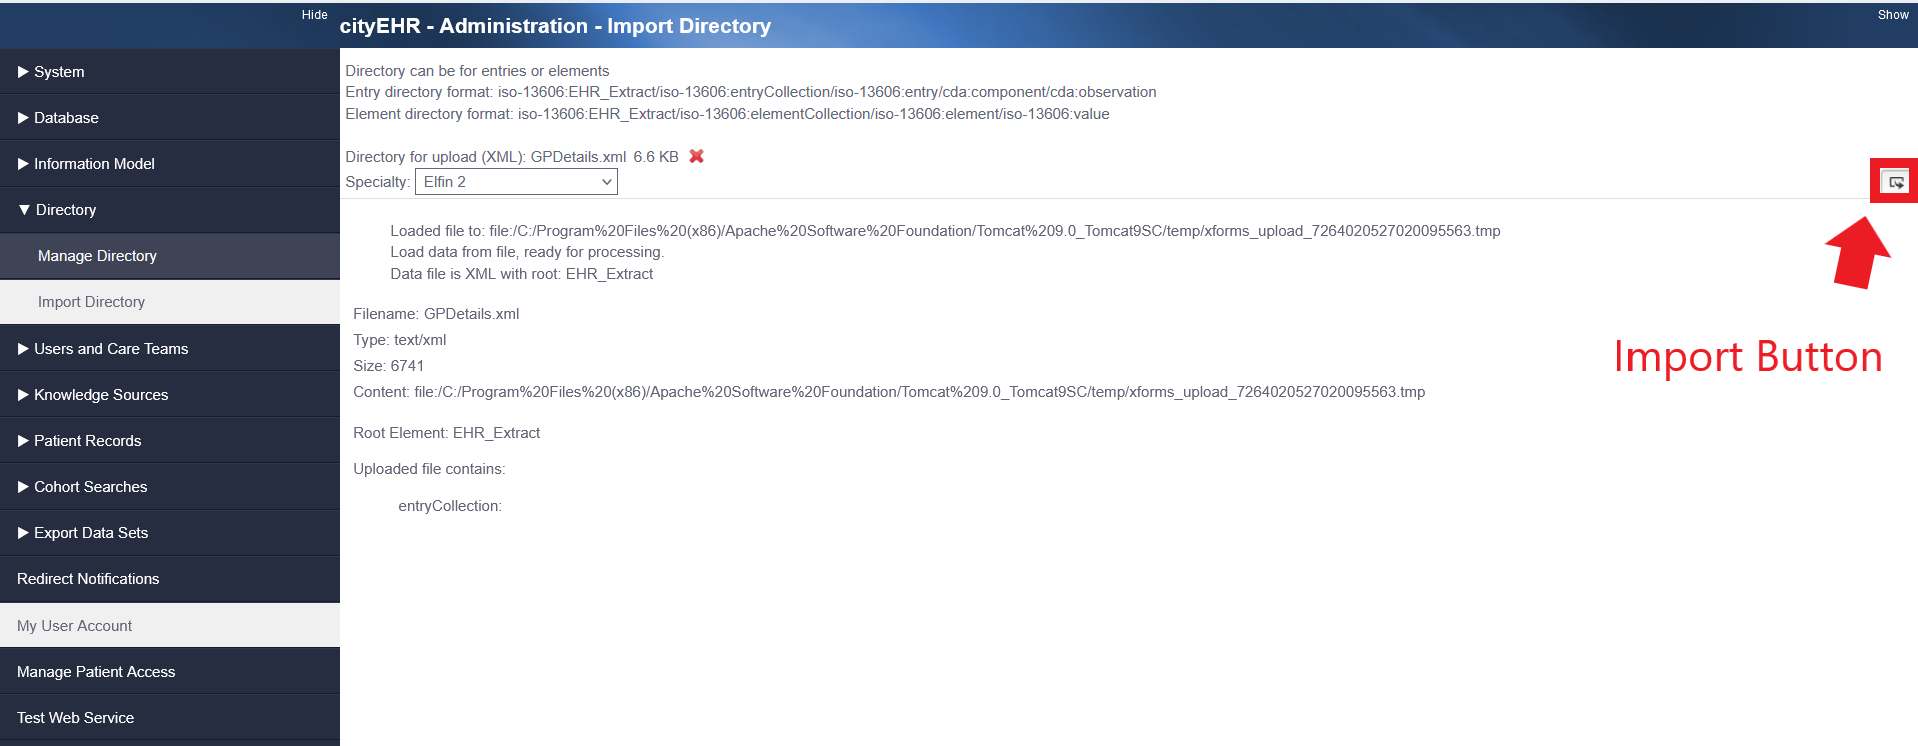
Importing the GP details file -
Now navigate to “Manage Directory” and navigate to your Entry Directories and you should be able to see “GP Details” as an option to edit!
Directory Look Up Using a Web Service
There is an example of a directory lookup using a web service on the Registration form in the Feature Demo information model that ships with cityEHR. The web service is a demonstration service that returns a randomly generated set of demographics data, given the patientId as an input parameter.


