Creating an Information Model
Creating and Configuring the Information ModelThe information model for your EHR application can be created in a spreadsheet by copying the model for the default cityEHR application that is found in the files:
-
cityEHR - Specialty - Feature Demo
-
cityEHR - Class - Diagnosis
-
cityEHR - Class - Drugs
-
cityEHR - Class - LabTest
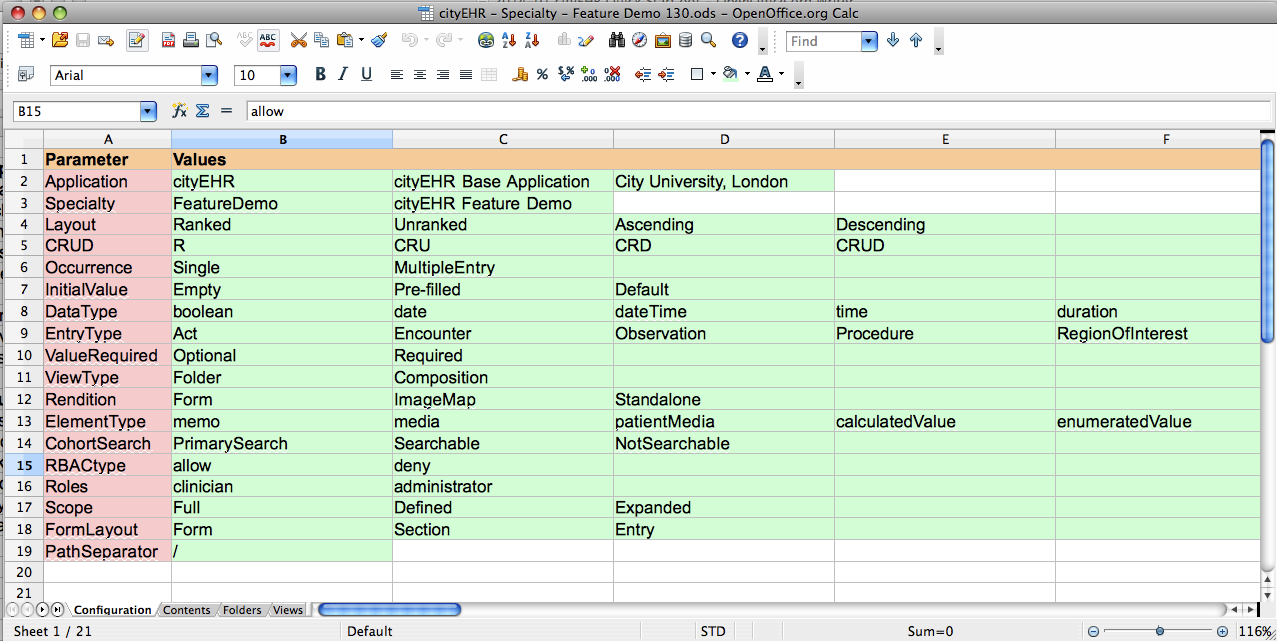
All four spreadsheets have a Configuration sheet at the front which looks as follows:
-
To begin doing this, open the cityEHR webapps folder
-
2. Navigate to the following folder: webapps/cityehr/WEB-inf/resources/apps/ehr/resources/applications/ISO-13606-EHR-Extract-cityEHR/informationModel
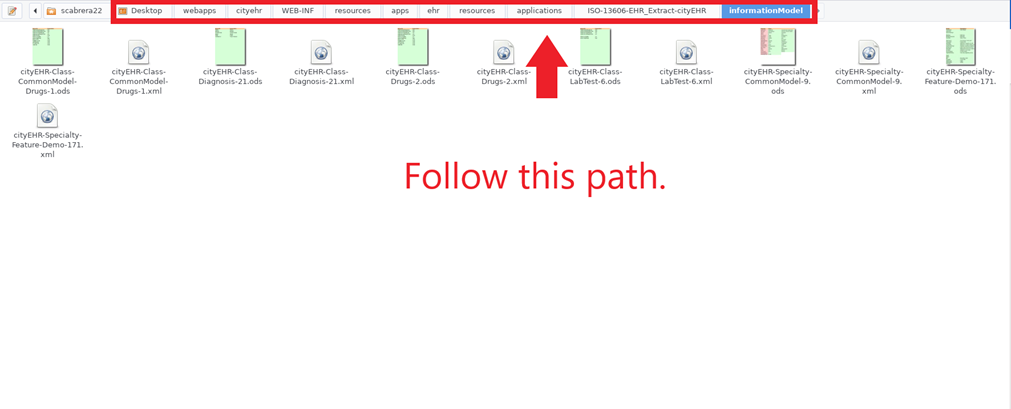
Folder path of information models You should land on the page above
-
Open the file named: Open the file named cityEHR-Specialty-CommonModel.
-
Go to File → Save a Copy → Rename it to your applicationId-CommonModel
-
Save your copy somewhere convenient.
-
Close the original cityEHR-Specialty-CommonModel
-
Open the copy you have saved at the location you saved it in.
-
Change the ApplicationId on the Configuration page to exactly match the ApplicationId you assigned your new application. This is found on Line 2, Cell B on the Configuration Sheet (1st sheet).
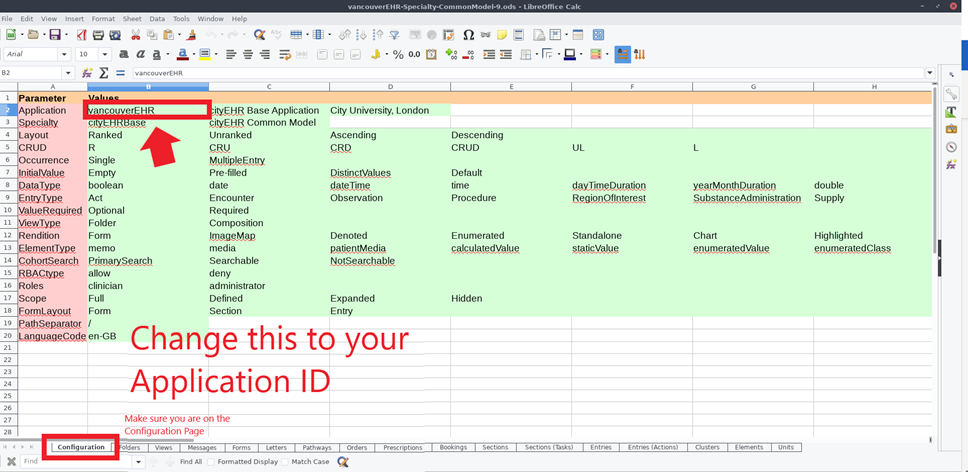
Changing the Application ID within the information model -
Save your changes (File → Save)
-
Now, navigate to File ---> Save As --> keep the name the same --> change the format to .xml under “All Formats” in the bottom right of the pop-up window. See image below.
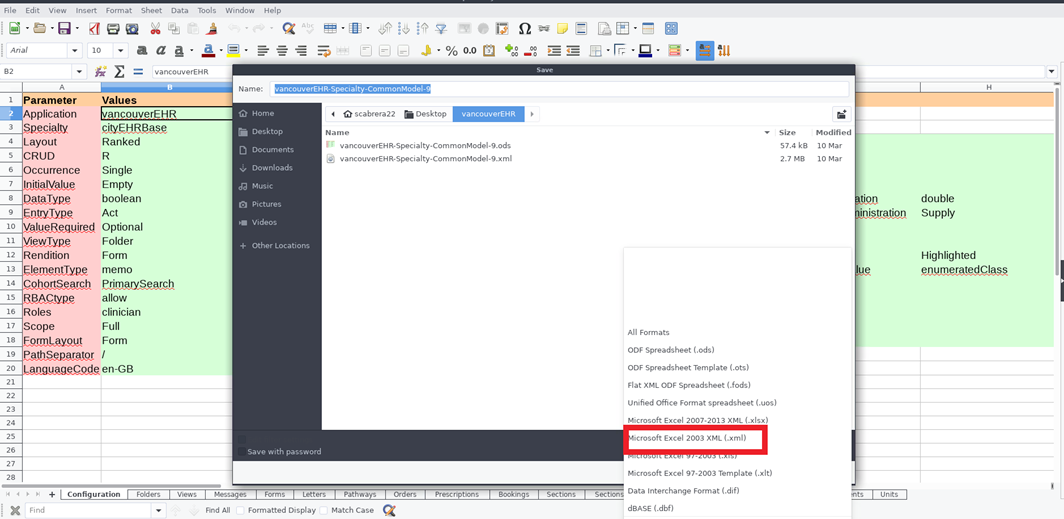
Saving the file as an XML -
Close your windows
-
Open cityEHR back up.
-
Log-in using the same credentials
-
Now navigate to your EHR. This should be added in the drop-down under “You can access more than one application”
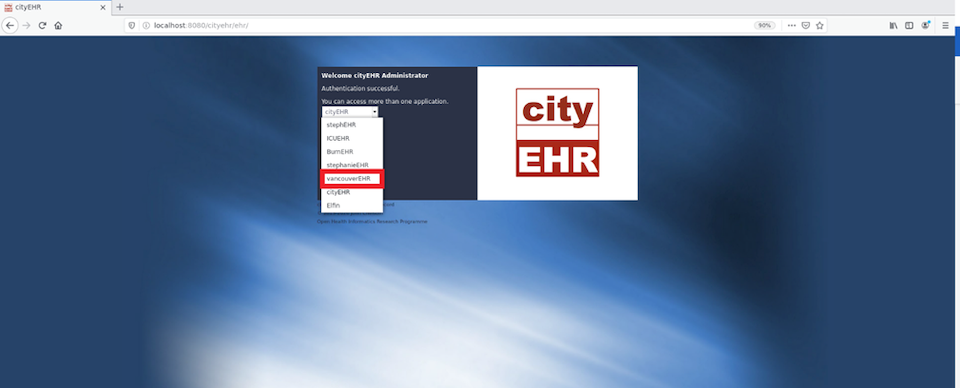
Selecting your application on cityEHR log on page Click Start
-
Navigate to Administration
-
Navigate to Information Model --> import information model on the menu on the left-side of the screen
-
Click Browse
-
Find the .xml file you just saved. Note: It will not work if you don’t select the .xml file
-
Select the .xml file
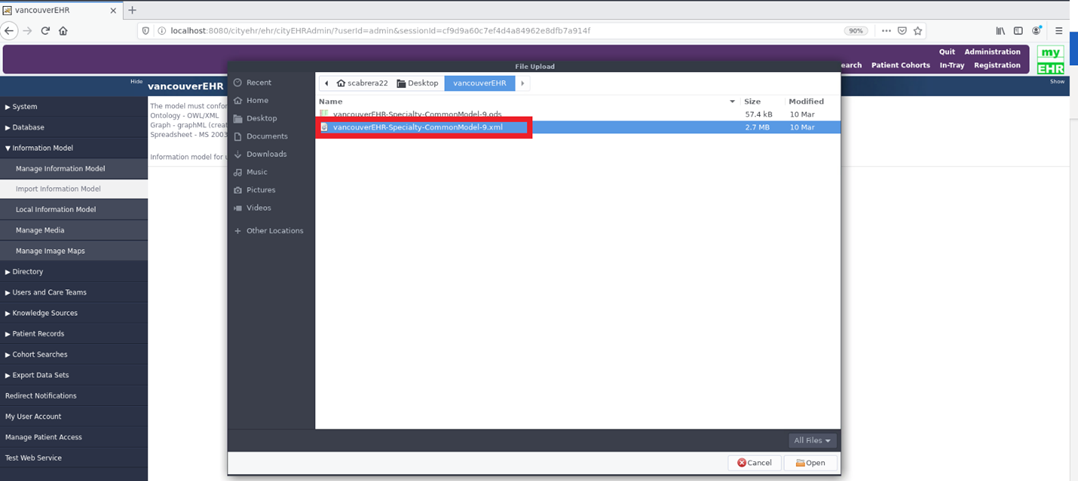
Selecting new XML file for import -
Import the information model using the icon at the top-right of the window. See image below.
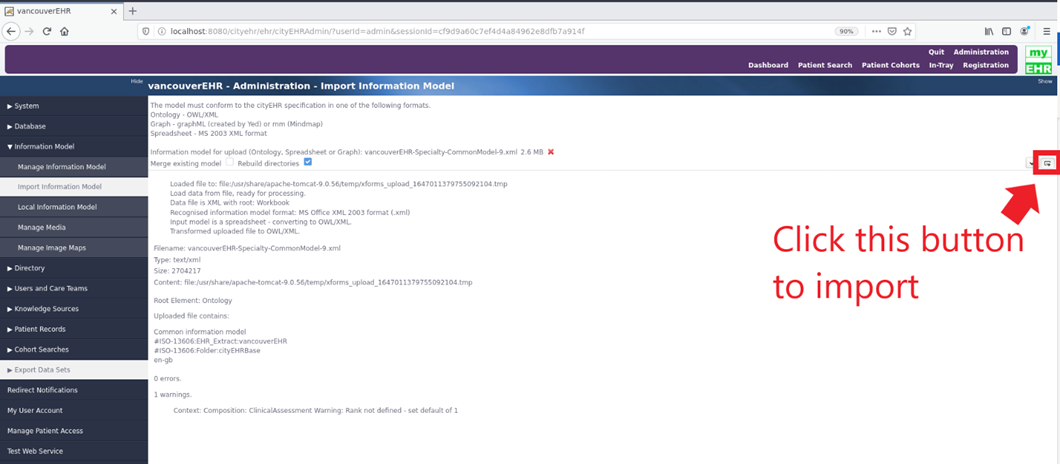
Button to begin import of new information model -
You should now land on a page that shows you the completion of 8 steps.
-
Navigate to Quit.
-
Log back into your application.
-
Navigate to Administration
-
Navigate to Application Parameters found in the menu on the left-hand side of the screen.
-
Click “Edit”
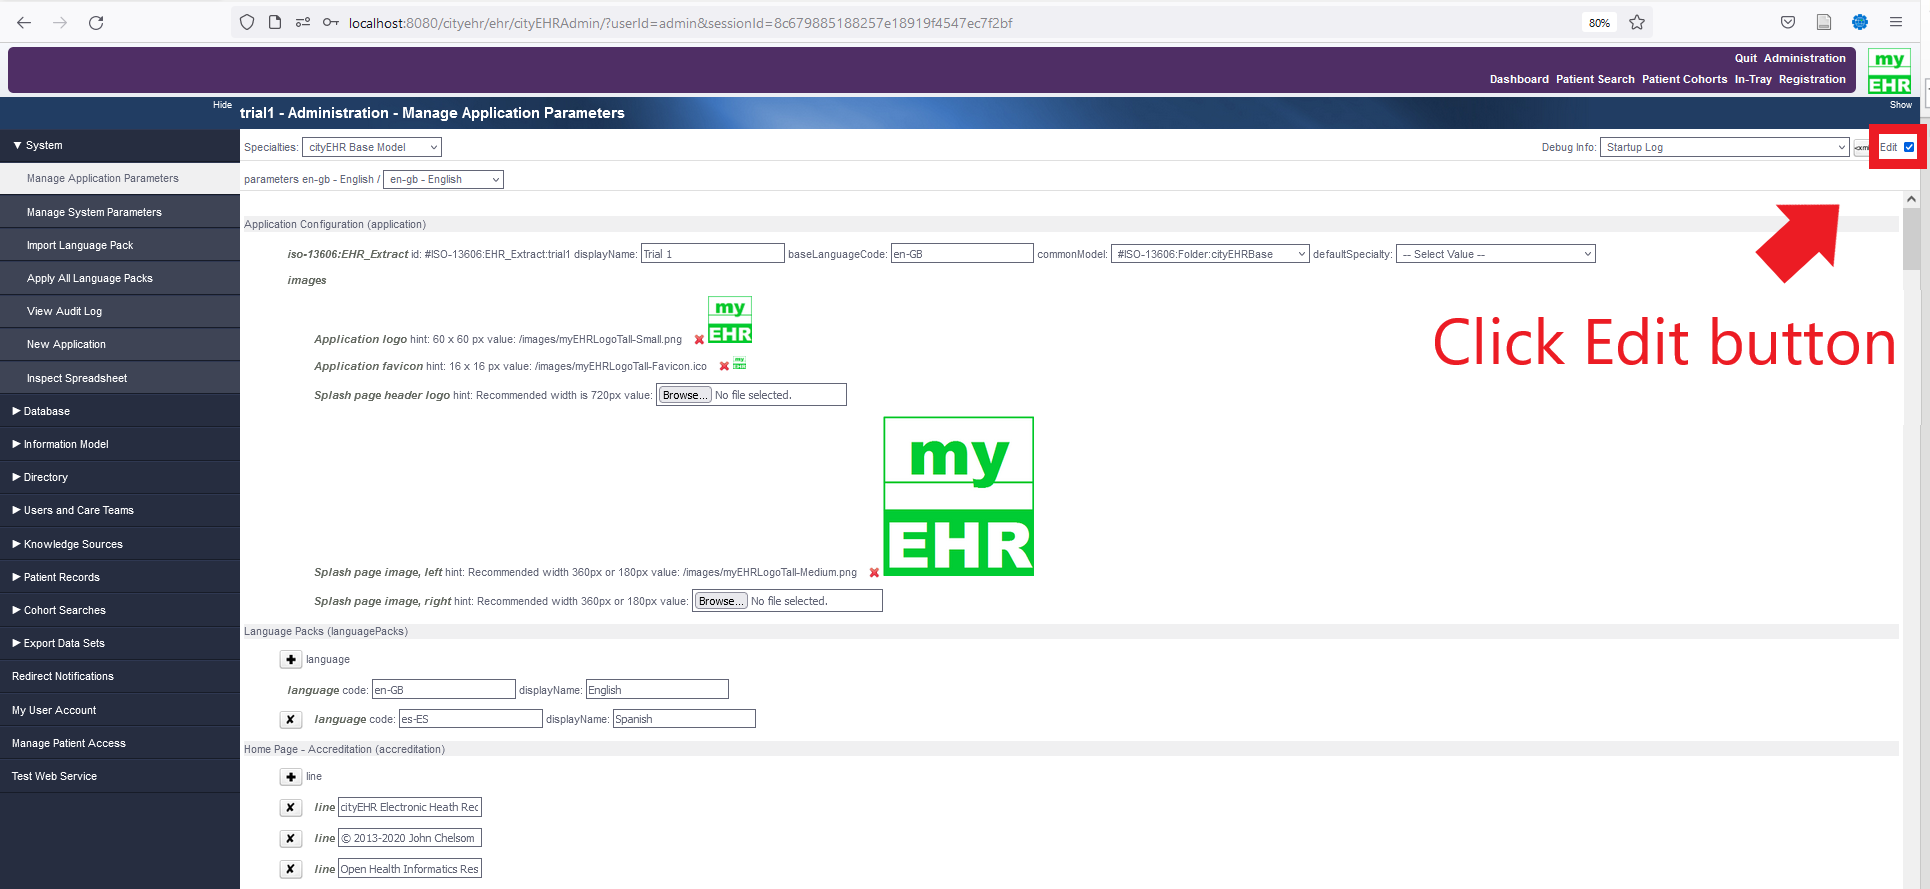
Editing Application parameters -
Navigate to the “commonModel” option on the screen and ensure that the option #ISO-13606:Folder:cityEHRBase is selected (see below)

Selecting the cityEHR Base folder -
Click Save and Navigate to Quit
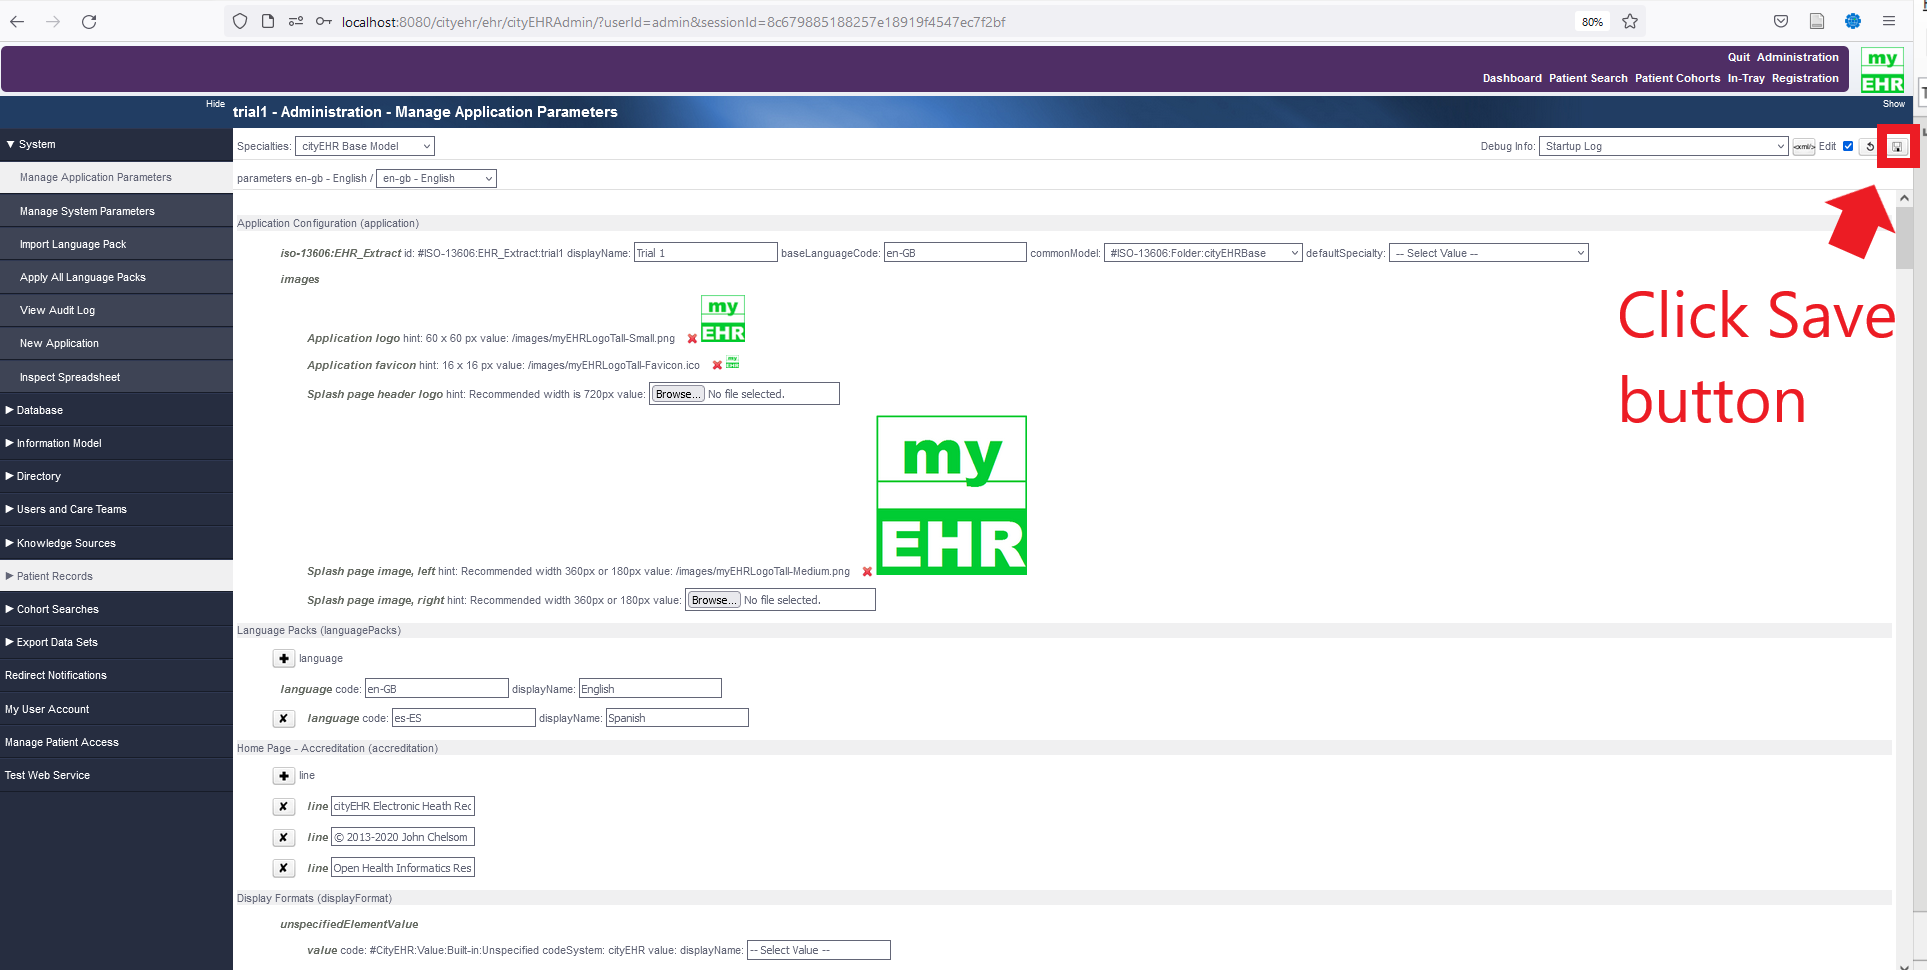
Saving Application Parameters -
Log back into your application
-
Navigate to Patient Search and Registration in the top-right fo the screen on the purple dashboard
-
You should see a fully formed Patient Search Page and a Registration Page. See below:
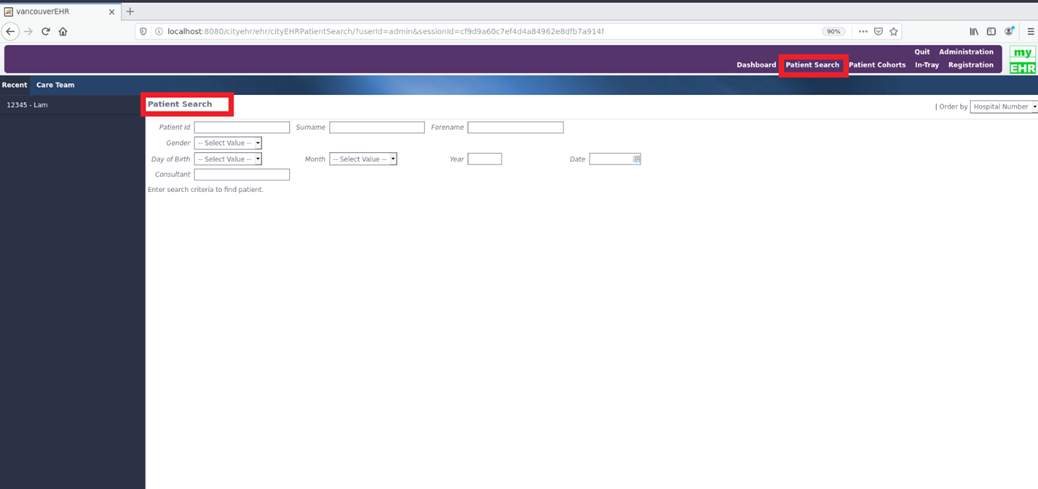
Populated patient search page on your application -
Navigate to Registration page
-
On the Registration page, register one patient. Click the menu button at the top right of the screen to finalize the registration.
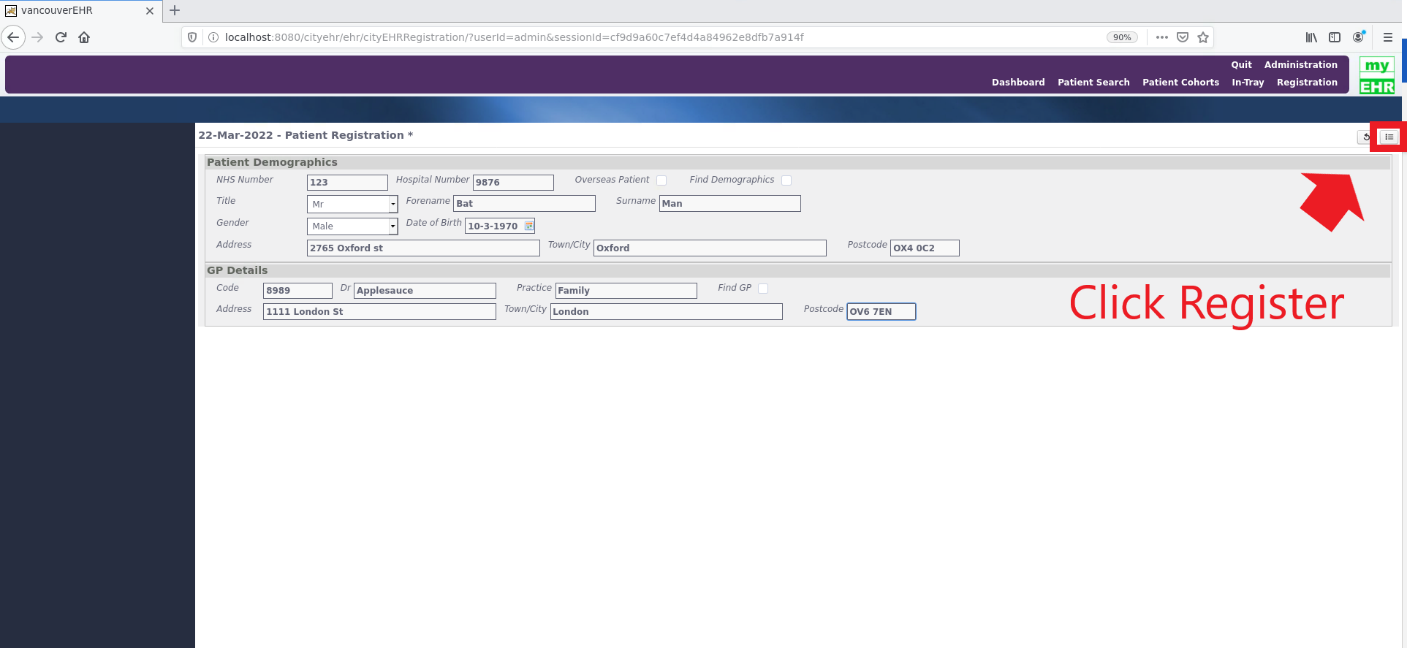
populated patient registration page on your application
Congratulations! You have registered one patient and made your own base application.
Activity complete! Quit cityEHR. If you would like to learn how to make changes to the spreadsheet to add Forms, Sections, Entries, Clusters, and Elements, please refer to the separate Information Modelling Guide.