Manipulating the Information Model as an Ontology
This topic guides users through browsing, exporting, editing, and importing ontology-based information models in cityEHR using Protege.Browse the Ontology in cityEHR
-
Move to the Administration screen by pressing the button in the top right corner of the screen. Then, move to Information Model in the Menu on the Left of the Screen. You should land on “Manage Information Model”. You will see a summary of the information models loaded for this installation (if not, press the selection to Manage Information Model in the left hand menu).
-
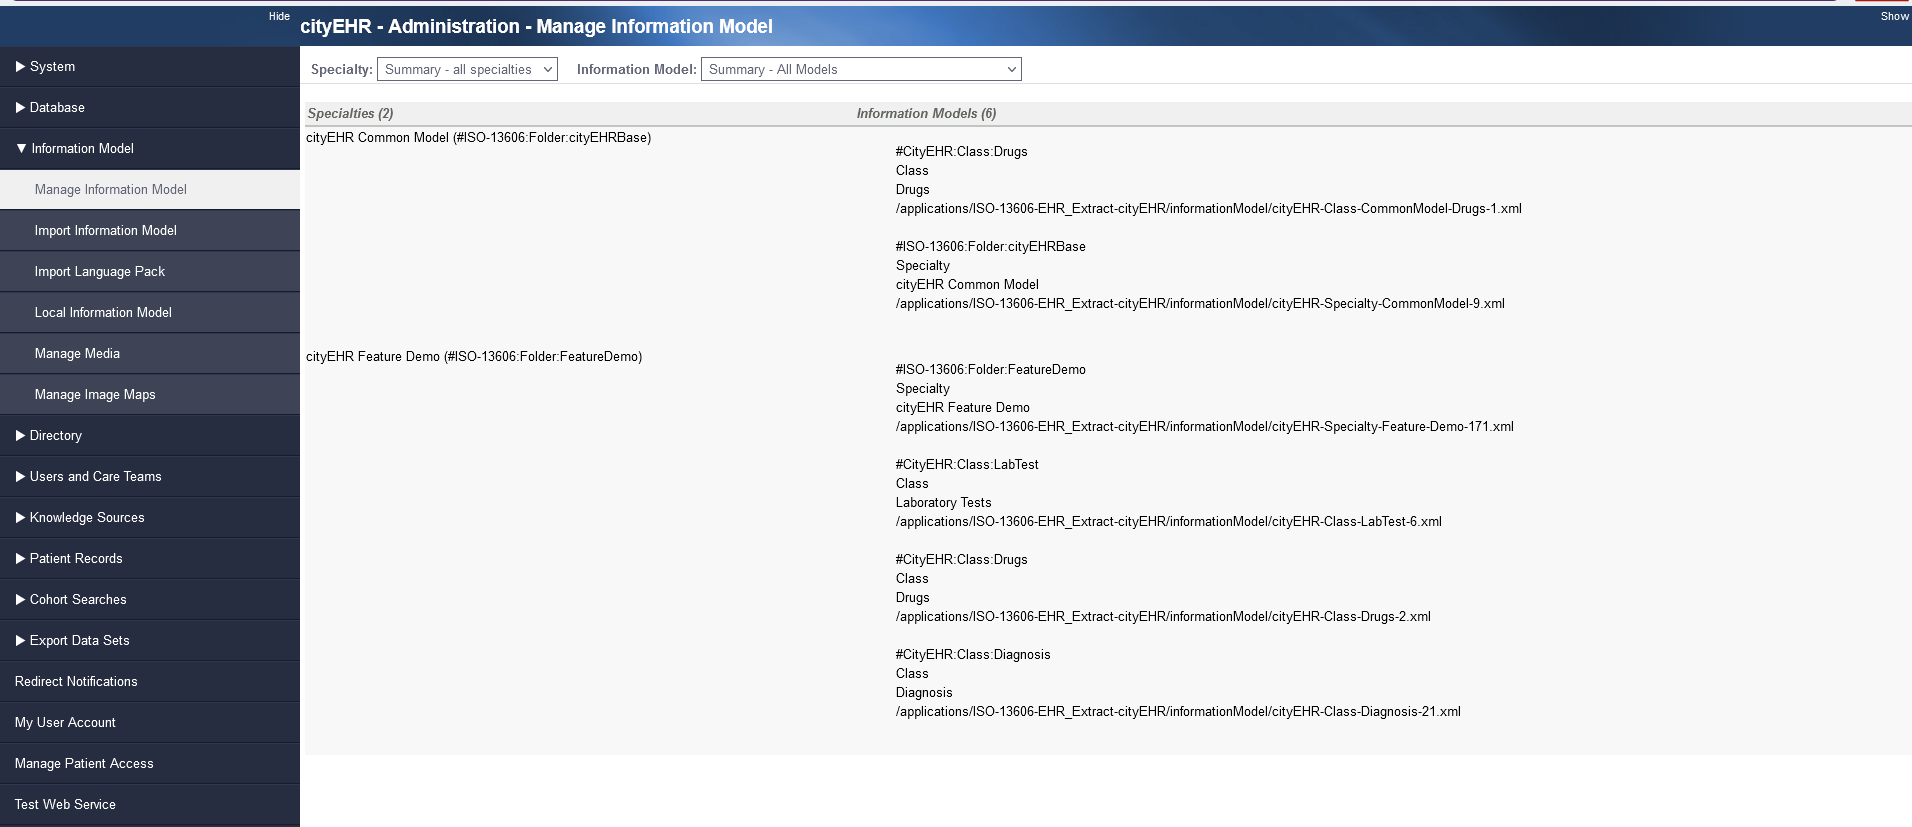
Base Manage Information Model screen -
In the selection for Information Model, find the model for Specialty - cityEHR Feature Demo. This is the model that was driving the interaction with the cityEHR that you have just encountered.
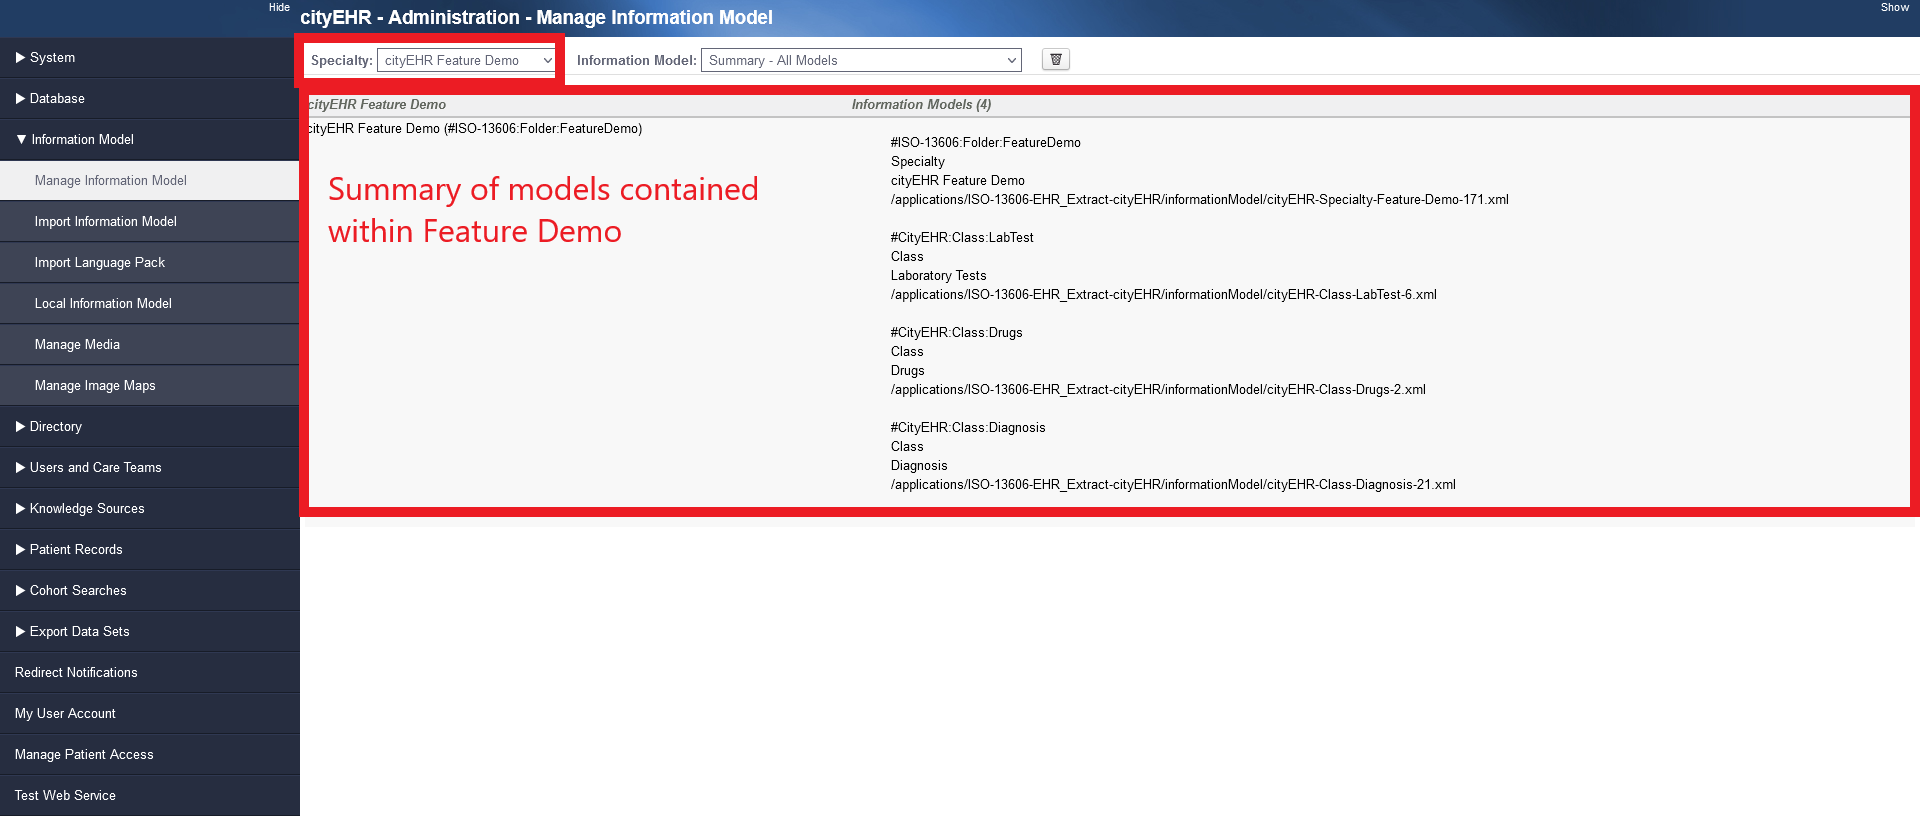
Selecting cityEHR Feature Demo information model -
The model is loaded to cityEHR as an ontology which you can browse by selecting “Feature Demo” from the Information Model drop down shown below. You can then expand the ontology by clicking the + sign. See image below.
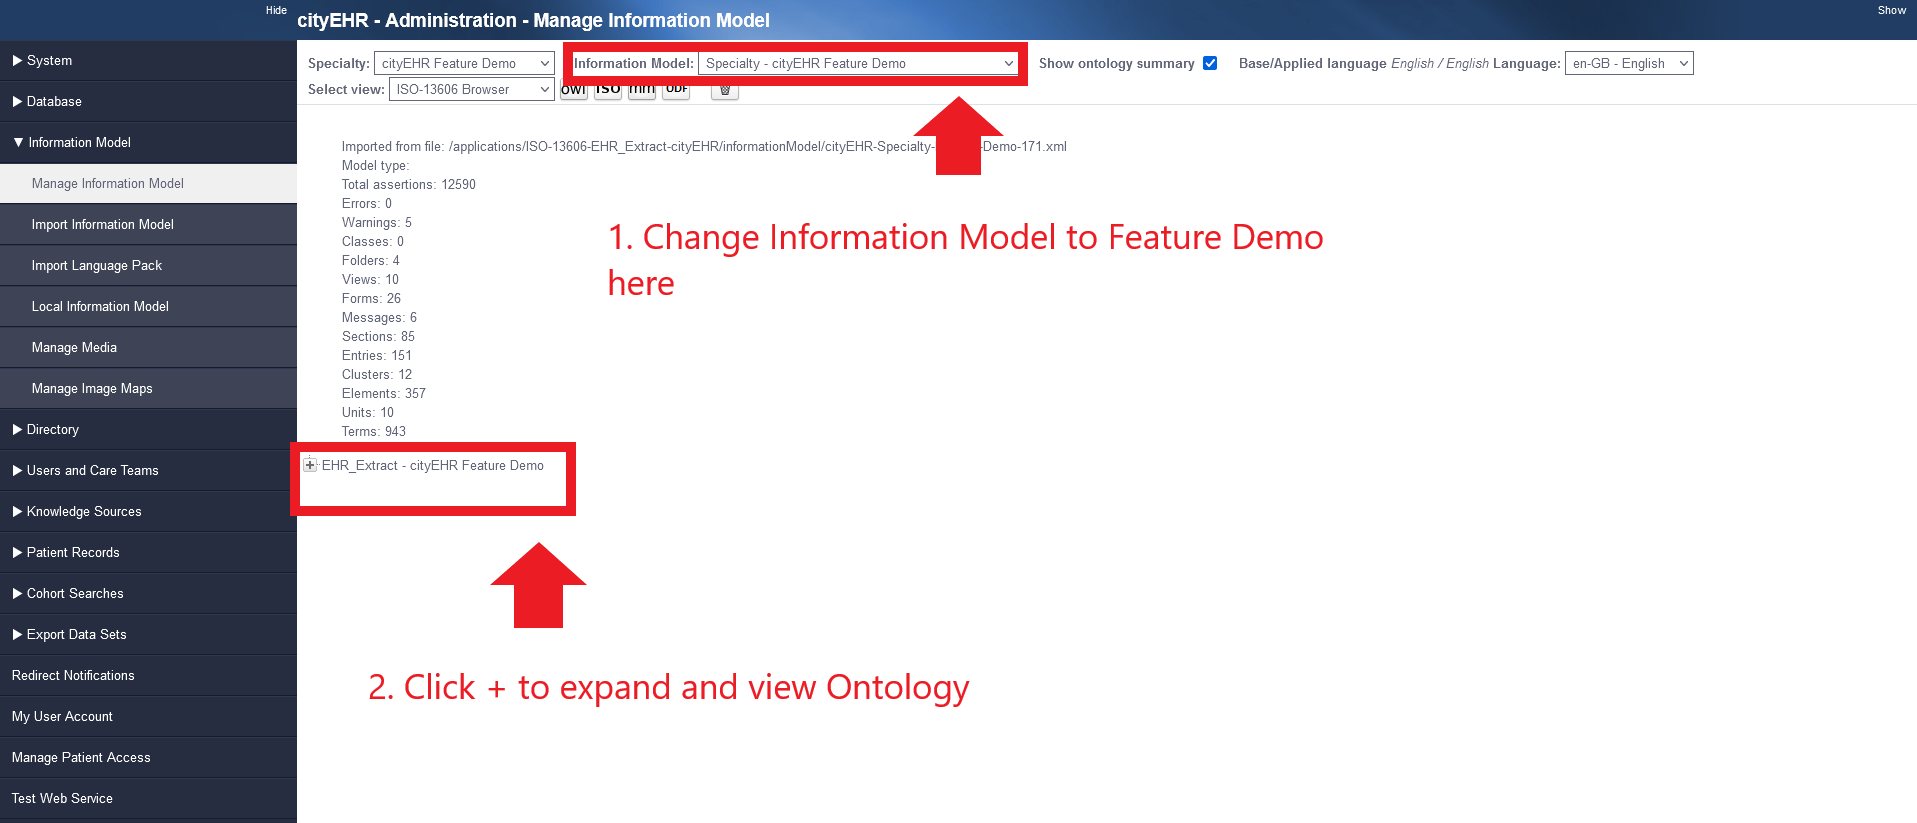
Changing information model and viewing ontology -
You can browse through the ontology by expanding the tree controls - you should see the Folders, Views, Forms, Sections and Entries for the screens you have already worked with. You can select any of the loaded models and browse either as ISO-13606, data dictionary contents, class hierarchies and class nodes, depending on the type of the model (specialty or class hierarchy).
Export the Ontology and Open in Protege
-
Export the ontology by clicking the Export button at the top-right. Select OWL to download the ontology as a zip file.
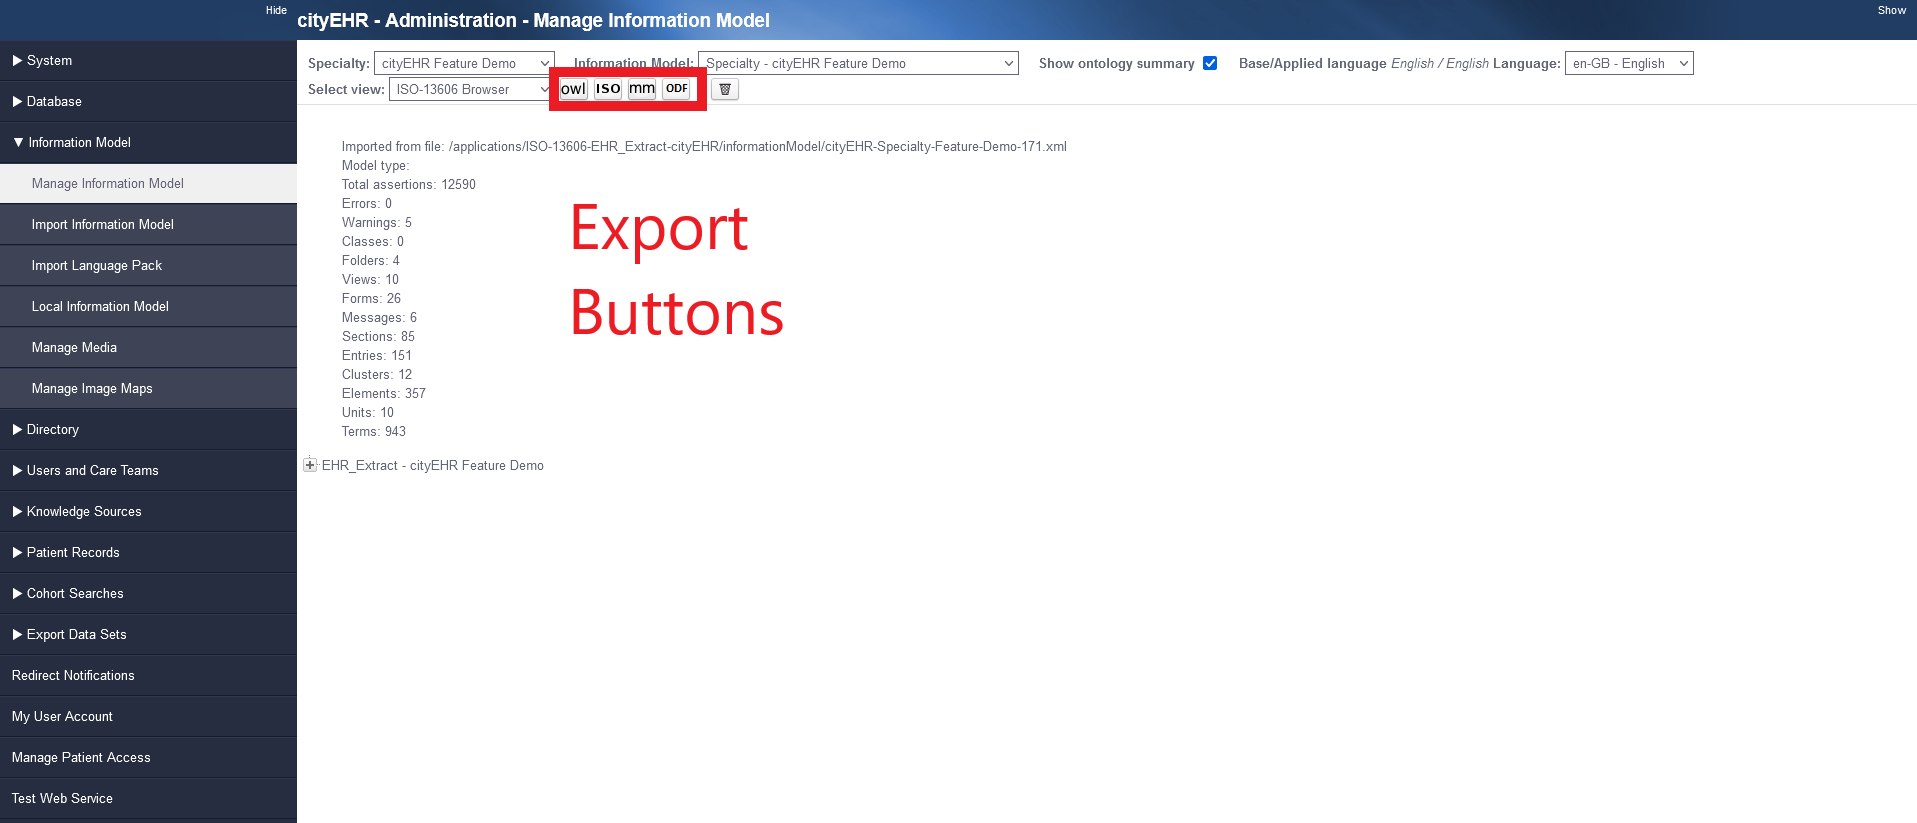
Exporting Ontology models -
Save the file on your system. Rename it to use a .zip extension and unzip it to obtain the ontology (an OWL/XML file). Rename the file to use a .owl extension for easier compatibility with Protege.
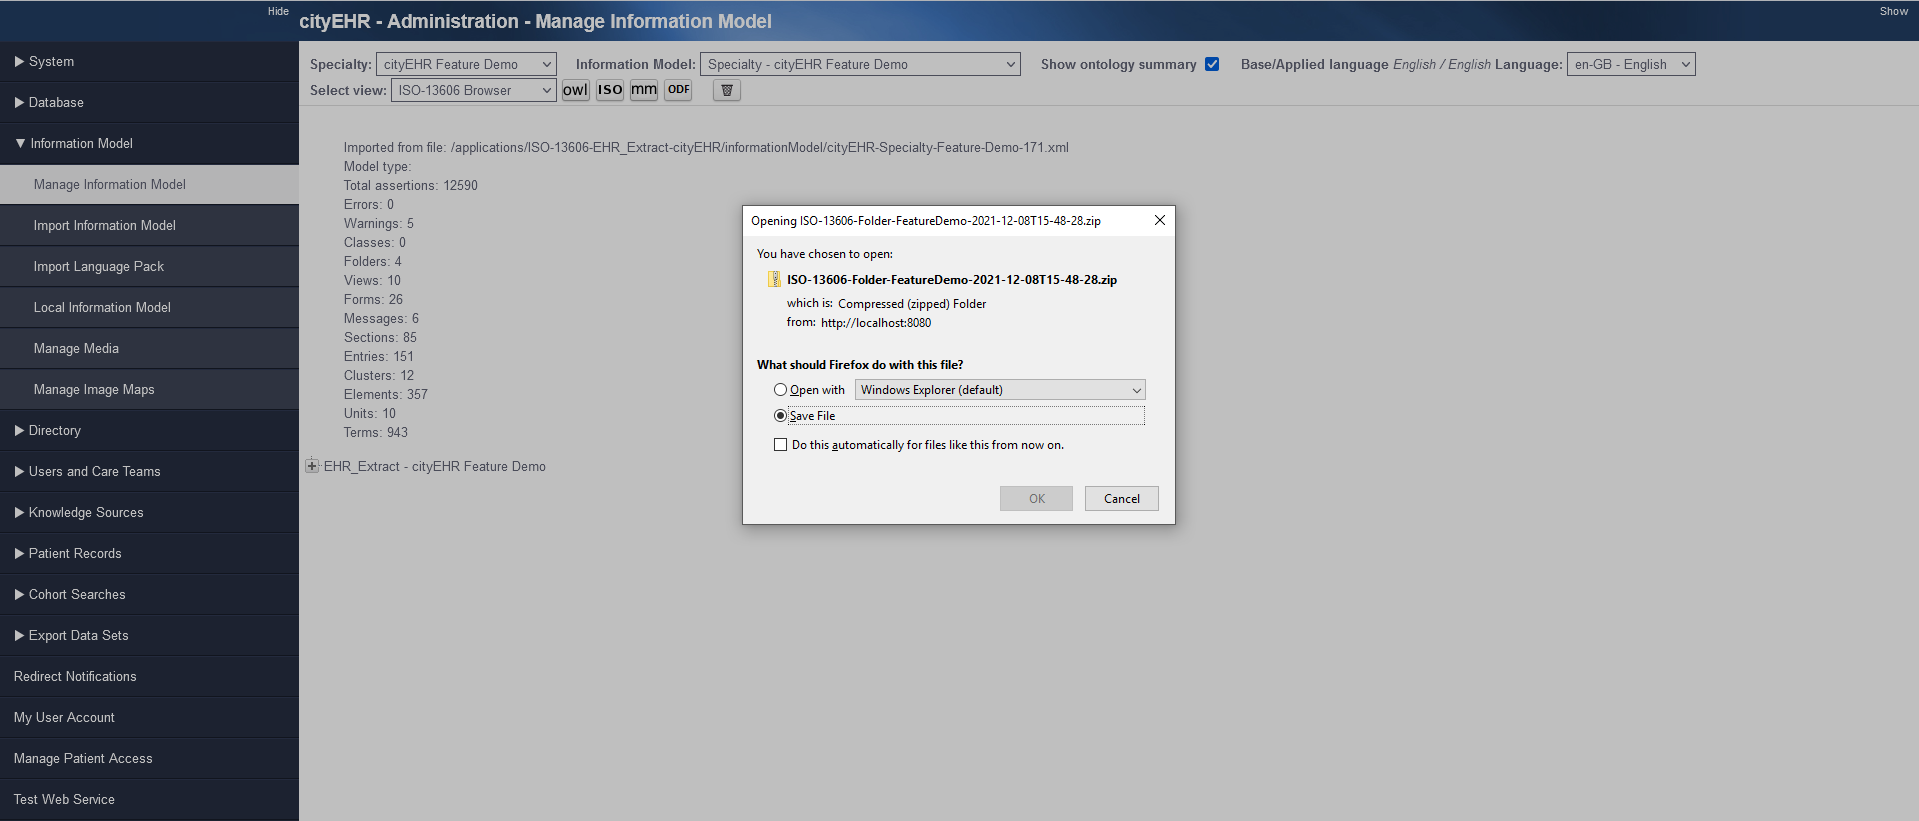
Renaming export file pop-up -
Open the ontology in Protege. Start Protege, select Open an existing ontology, navigate to the unzipped file, and open it. You can also double-click the file if it has a .owl extension.
-
Use the Classes tab to view the class hierarchy and the Individuals tab for specific instantiations of the Feature Demo model.
-
Explore classes corresponding to ISO-13606, HL7 CDA, and cityEHR-specific components.
-
Under the Object Properties tab, expand Top Object Property to view all object properties in cityEHR. These are split into two sets, with names starting 'has' or 'is' - each named pair being the inverse of each other.
-
Similarly, use the Data Properties tab to view all data properties available in the architecture.
Edit the Ontology
In Protege, try adding a new section to a form or new entries to an existing section. Save your changes using Save As to preserve the original file in case of errors.
Note: Ensure you follow your workshop instructor's guidance to prevent issues in the ontology structure.
Load the Model to cityEHR
-
Return to the cityEHR Admin page and select Import Information Model from the left-hand menu. Browse to your OWL/XML file, upload it, and then click Import.
-
Once the import completes, a summary of the loaded model will appear. If errors are found, the model will not be loaded, and the errors will be reported.
-
After a successful import, return to the Patient Search screen. Select a patient and navigate to the updated form to verify the changes.