Viewing the Patient Record
Summary View and Charting
When you first access a patient's record, the Summary page is displayed, providing a selection of various summary views.
-
The default view is the summary for Bone Chemistry – Messages. These are bone chemistry results that have been sent to the cityEHR as messages from the laboratory which performed the tests. (At least we are pretending this in the test data, although the results used were originally generated in this way)
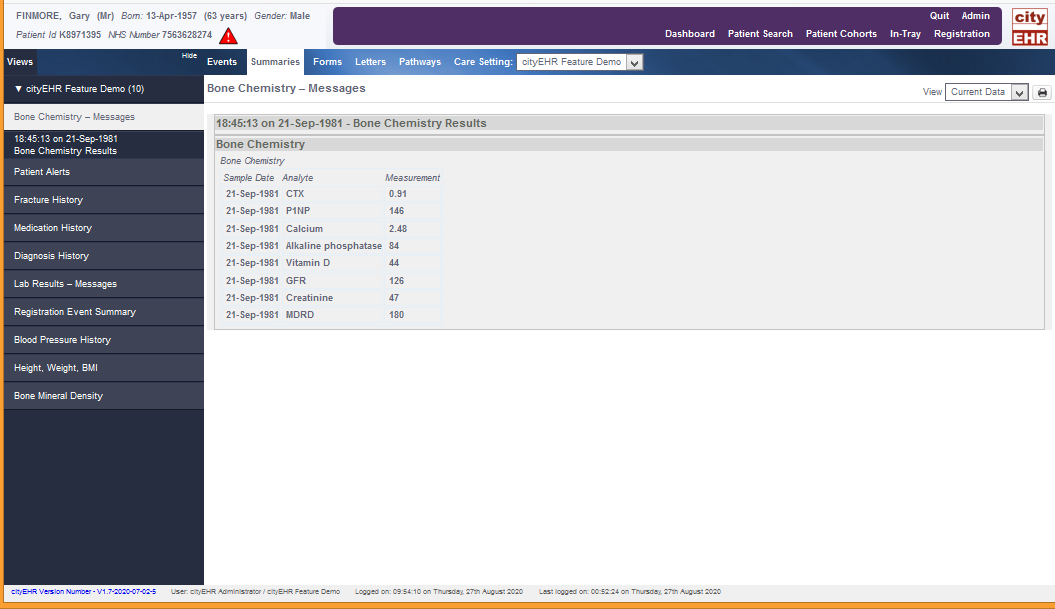
Summary View for Bone Chemistry – Messages -
By default, only the most recent set of bone chemistry results is shown. Use the drop-down menu at the top-right of the pane to select Historic Data, displaying the complete history of results for the patient.
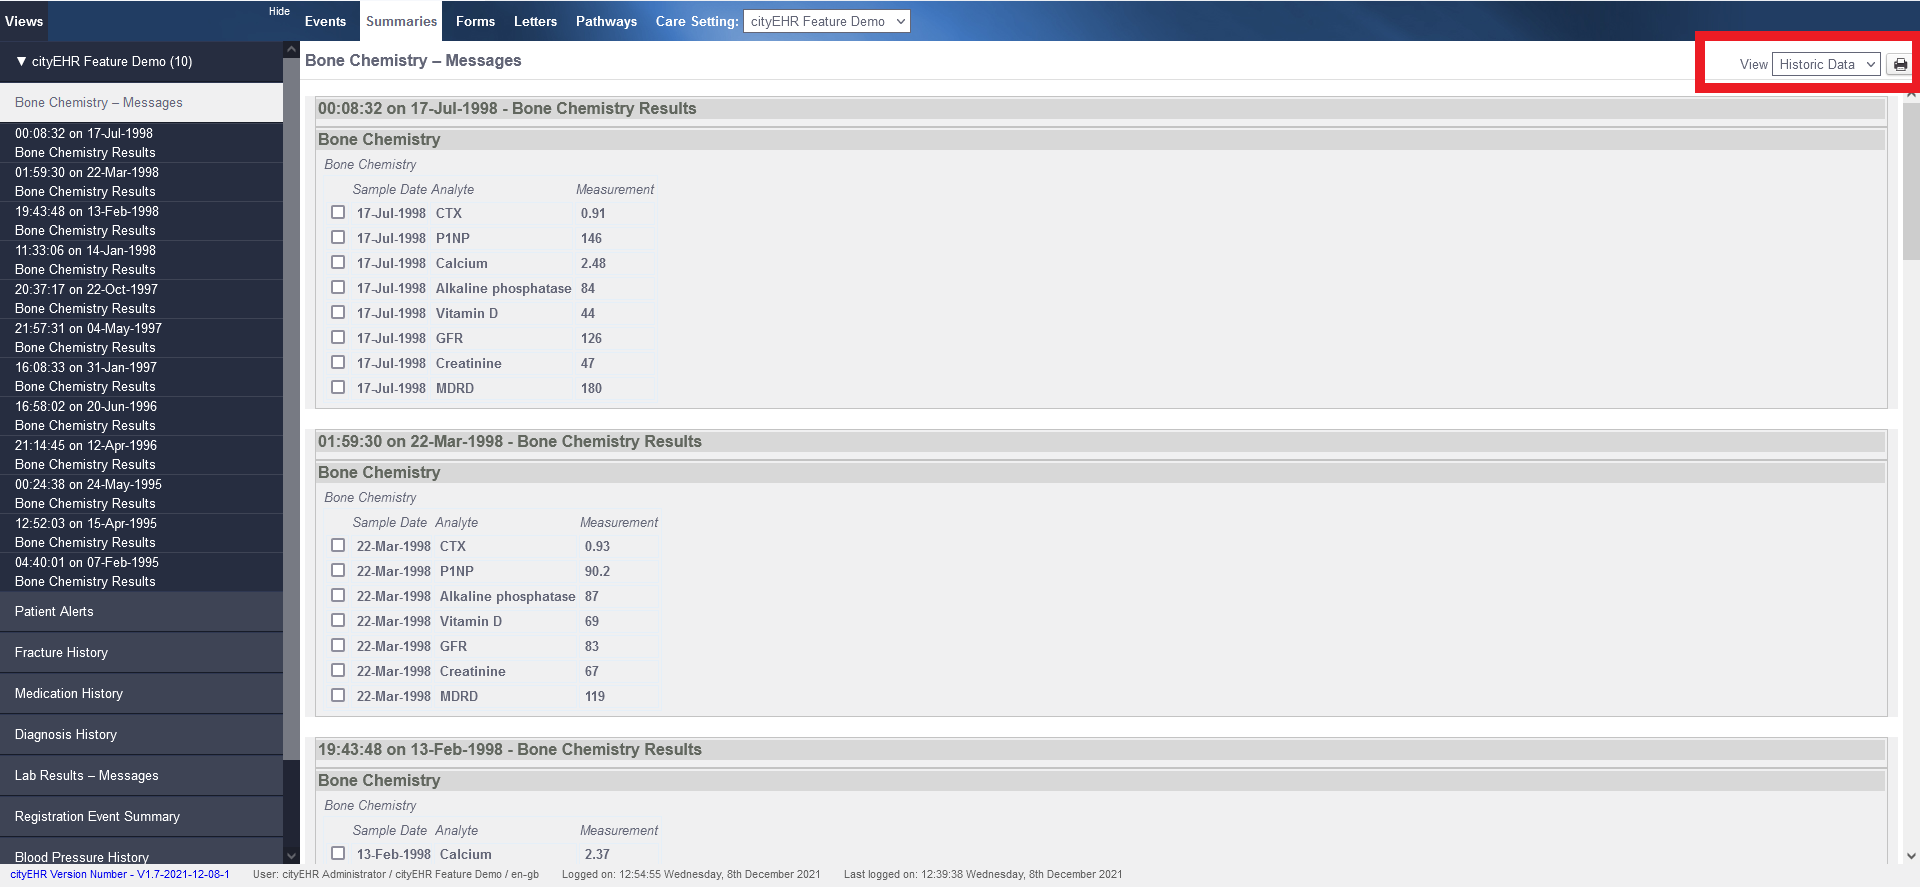
Changing Summary View to “Historic Data” -
Select two or three analytes (e.g., CTX, P1NP, Calcium) to view on a chart by checking the corresponding boxes. Selecting a box in one result set will also select it across other sets.
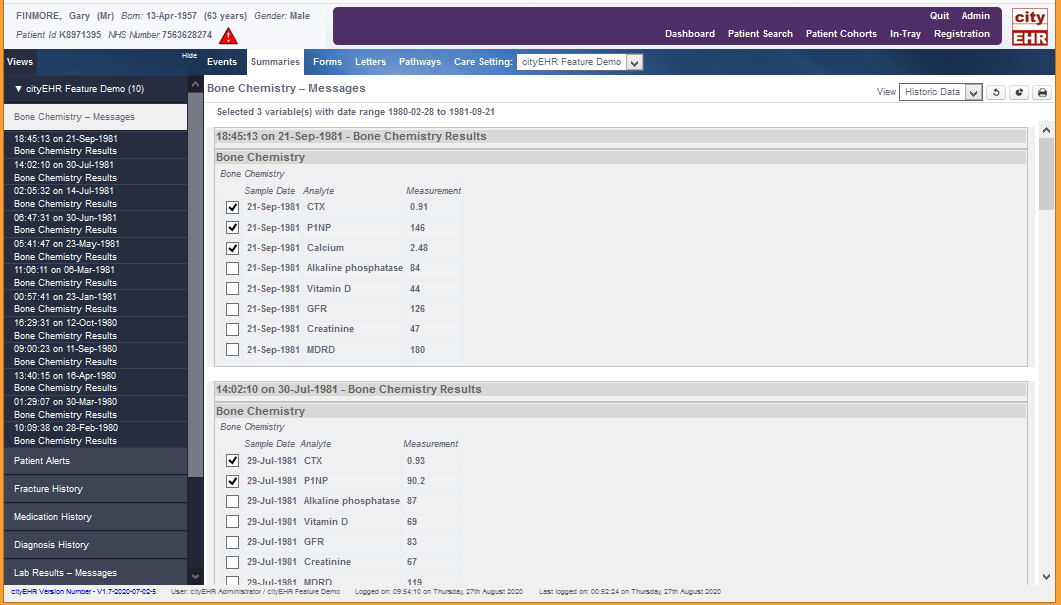
Selecting Analytes to View on Patient Chart -
As analytes are selected, a summary of the total number and the data range is updated at the top of the pane.
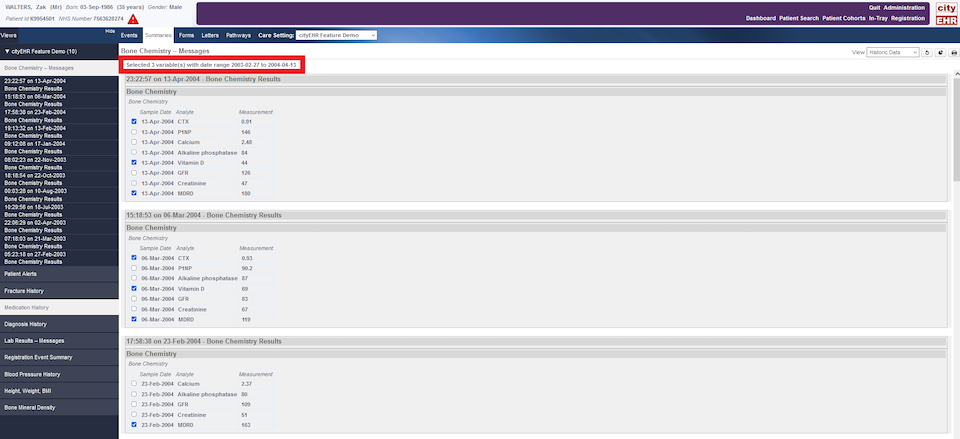
Summary of Analytes Selected and Overall Data Range Covered -
Select the Chart button, now visible at the top-right of the pane, to generate a chart for the selected analytes.
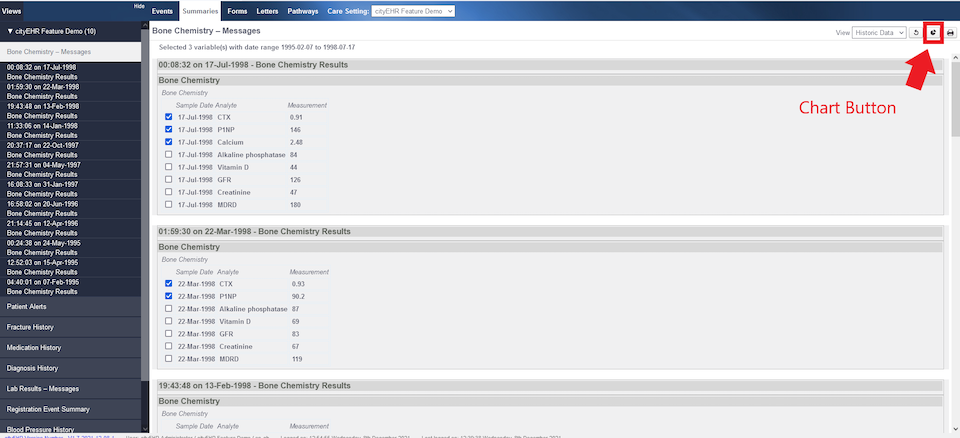
Using Chart Button to Commit Analytes for Chart View -
On pressing the Chart button, a dialogue window will appear showing the charts for the selected analytes. Adjust the chart parameters using the options at the top of the dialogue.
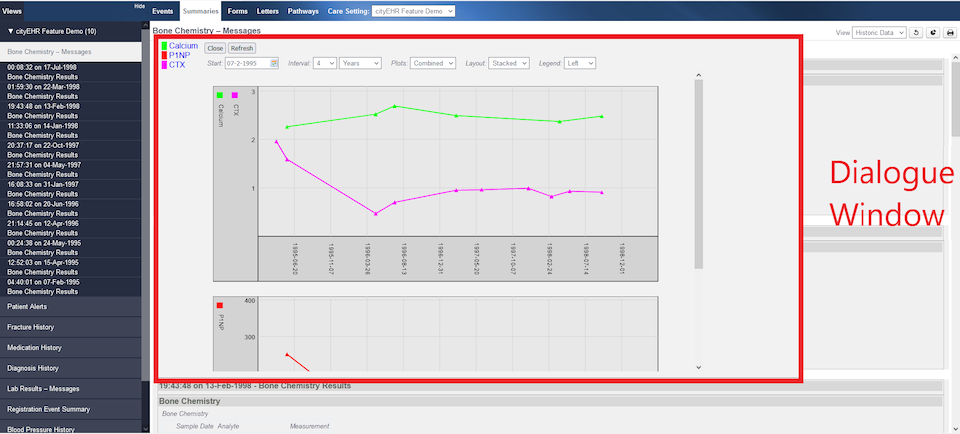
Dialogue Window with Charts of the Analytes Selected -
When finished, press the Close button at the top of the dialogue to dismiss the window.
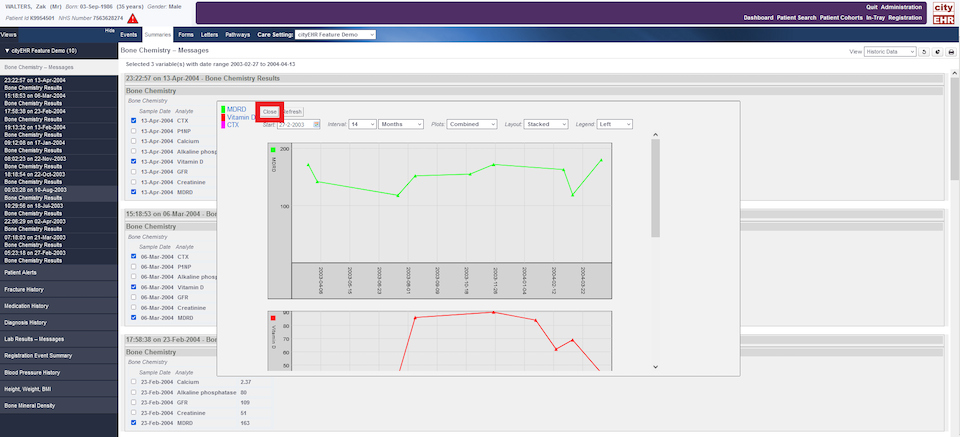
Dismissing the Dialogue Window Using the Close Button
Viewing the Longitudinal Record
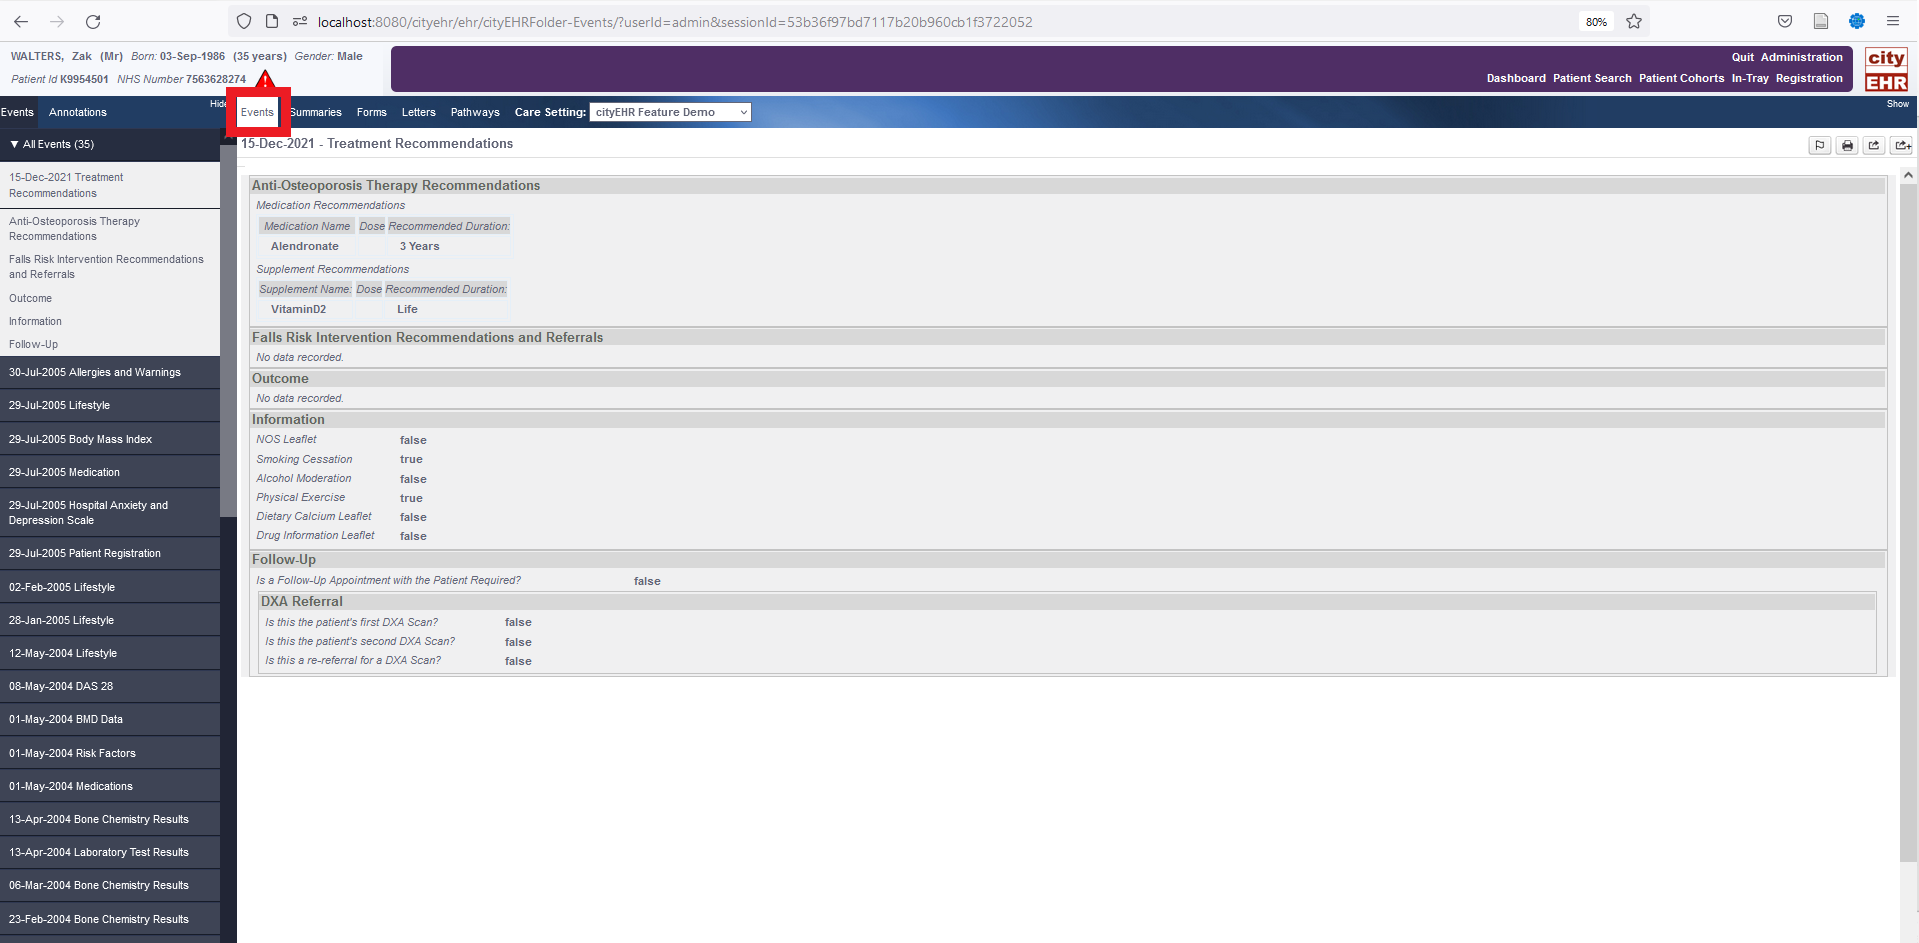
To view all events recorded for a patient, navigate to the Events tab at the top of the viewing pane.
-
The left-hand panel displays a list of all recorded events. Details of the most recent event are shown in the main viewing pane.
-
Select any historic event from the list to display its details in the main viewing pane.
Annotations and Notifications
The Events page provides access to the full longitudinal record. While cityEHR prevents modifications to committed (published) events, users can add annotations to enhance or provide context to existing entries.
-
Select a historic event, such as a Hospital Anxiety and Depression Scale (HADS) assessment, to annotate.
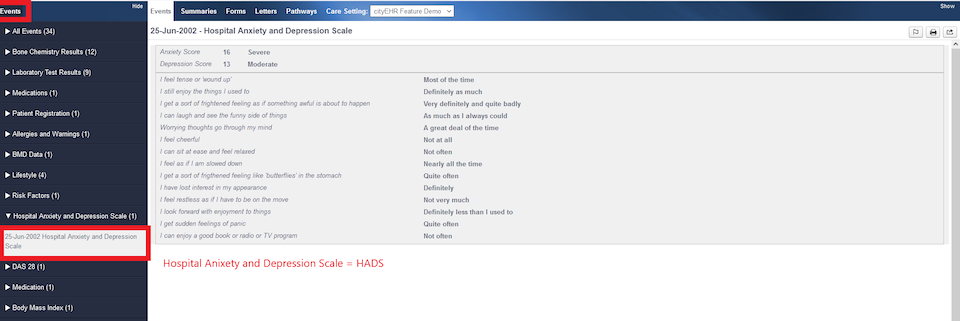
Selecting a Historical Hospital Anxiety and Depression Scale Form for Annotations -
Click the small Flag button at the top-right of the record view. This will display the annotations for this event.
-
Click the '+' button at the top-left to create a new annotation.
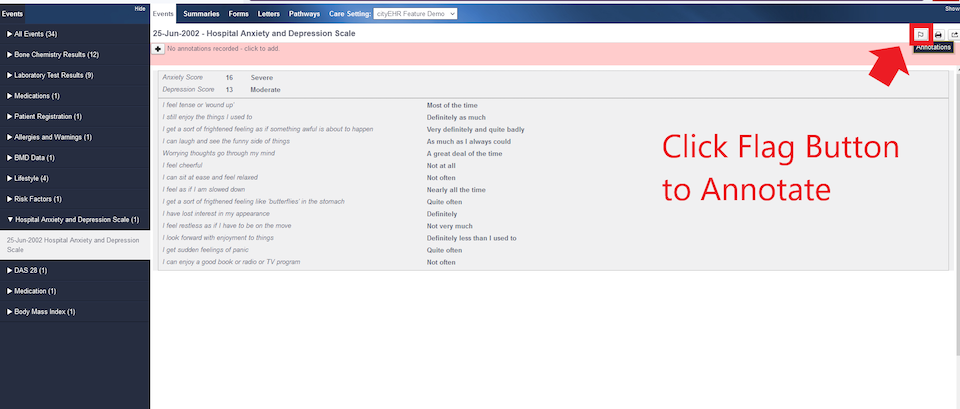
Clicking Flag and ‘+’ Buttons to Annotate -
Enter the Type and Comments for the annotation, then press Save in the top-right menu to commit the annotation.
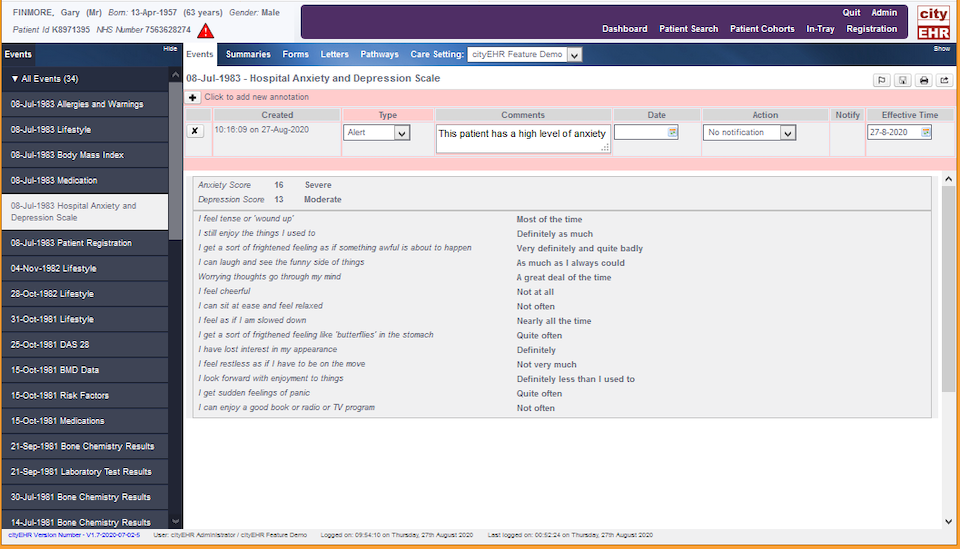
Annotating a Hospital Anxiety and Depression Scale Form -
The saved annotation is stored as a new event in the patient record, linked to the original annotated event.
-
Annotations can also serve as notifications for other clinical users regarding specific events in the patient record.
-
To notify a user, create a new annotation and use the Action drop-down menu to select the intended user(s).
-
For fresh cityEHR installations, with only an administrator user, select Notify Role as the action and choose Administrator from the drop-down.
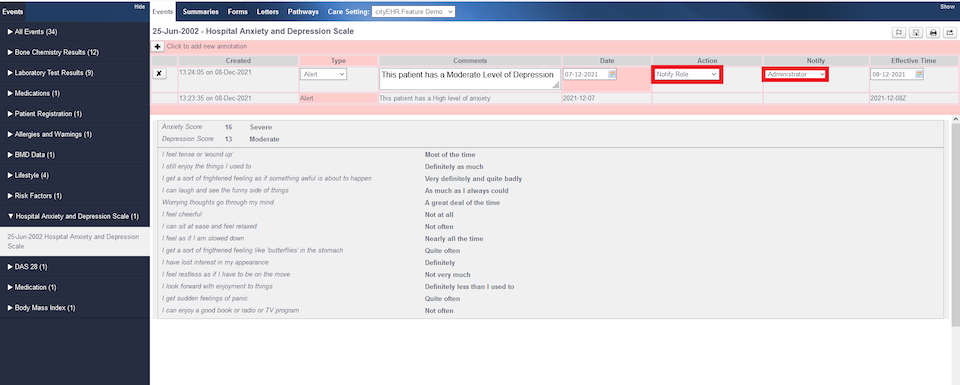
Notifying Administrator Using Annotations -
Complete the notification details and press Save to commit the annotation. The notified user will receive a message in their InTray, which is covered in a later section of this guide.