Exploring the Default cityEHR Application
This topic introduces the process of registering a new patient in the cityEHR application, guiding users through each step required to create a patient record. It explains how to access the registration form, complete required fields, and leverage features such as the demographics lookup service for auto-filling patient details. Additionally, the chapter covers options for entering GP details and addresses potential error messages. By the end, users will understand how to finalize patient registration and then search for them.Registering a New Patient
On install, the database for the cityEHR application does not contain any patient records. To start using cityEHR, the first step is to create patient records via the patient registration page.
-
Log in using the default credentials:
-
Username: admin
-
Password: password
-
-
Click the Registration button in the System Navigation pane to access the registration form.
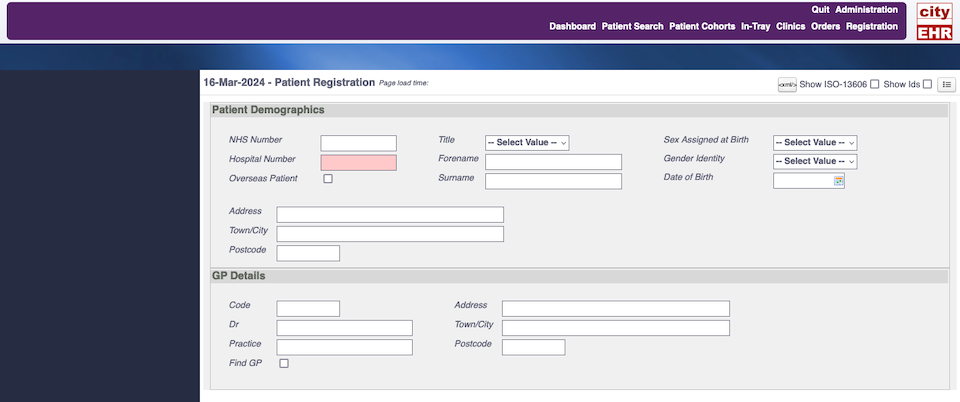
Patient Registration Form -
Enter a Hospital Number, which is a mandatory field (highlighted in pink) and serves as the unique patient identifier. All other fields are optional.
-
Fill in patient details (e.g., NHS Number, Title, Forename) manually or use the Find Demographics service:
-
Enter the NHS Number (simulating a national patient identifier).
-
Check the Find Demographics checkbox, which appears after entering the NHS Number.
-
The demographics service populates remaining fields with simulated data or, in live systems, pulls data from EPR or national services.
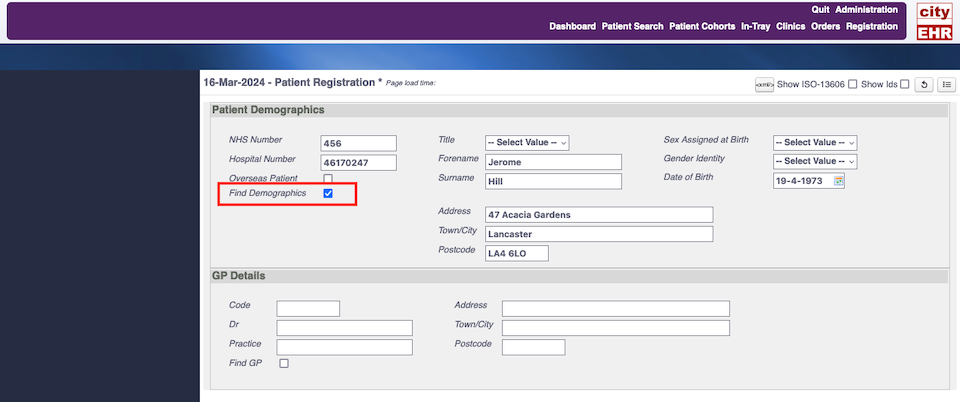
Patient Registration “Find Demographics” Lookup Service -
-
Similarily, Fill in GP details manually or use the Find GP service:
-
Enter Oxford in the Town/City field.
-
Check the Find GP checkbox to display two options. Select one to auto-fill GP details.
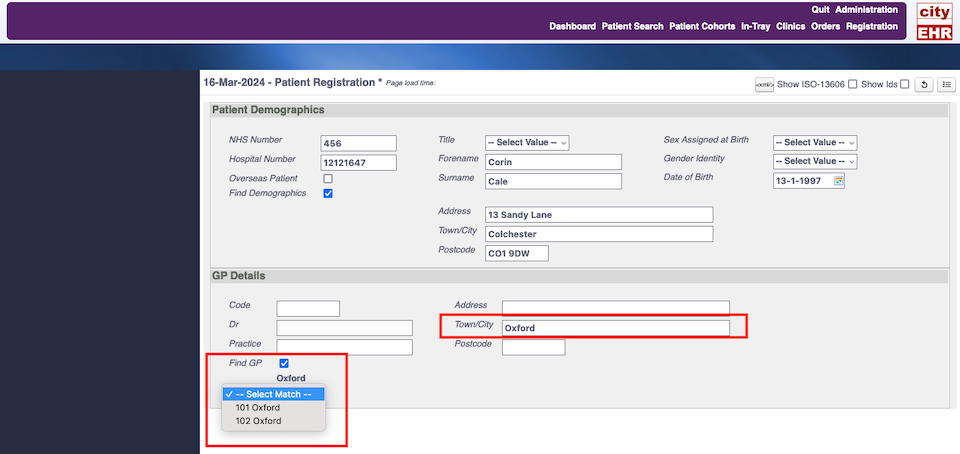
Find GP Service -
-
Once all the details are entered (either by typing in the fields or by using the lookup services). Click the Register button (hover over it to see the label).
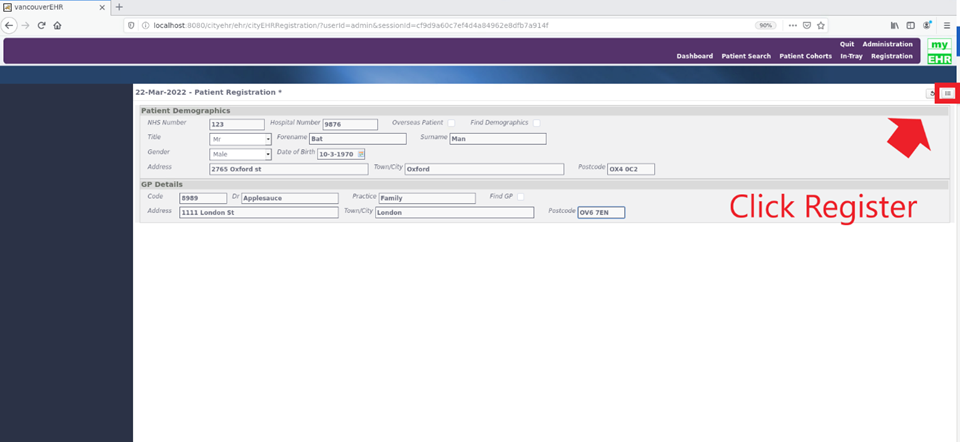
Register Button -
If successful, confirm the action in the dialogue box and choose the next navigation step (default: Hospital Anxiety and Depression Scale form).
-
If the Hospital Number is missing or already exists, an error message will appear. Dismiss it, update the field, and try again.
-
Once registered, a confirmation message is displayed, completing the patient registration process.
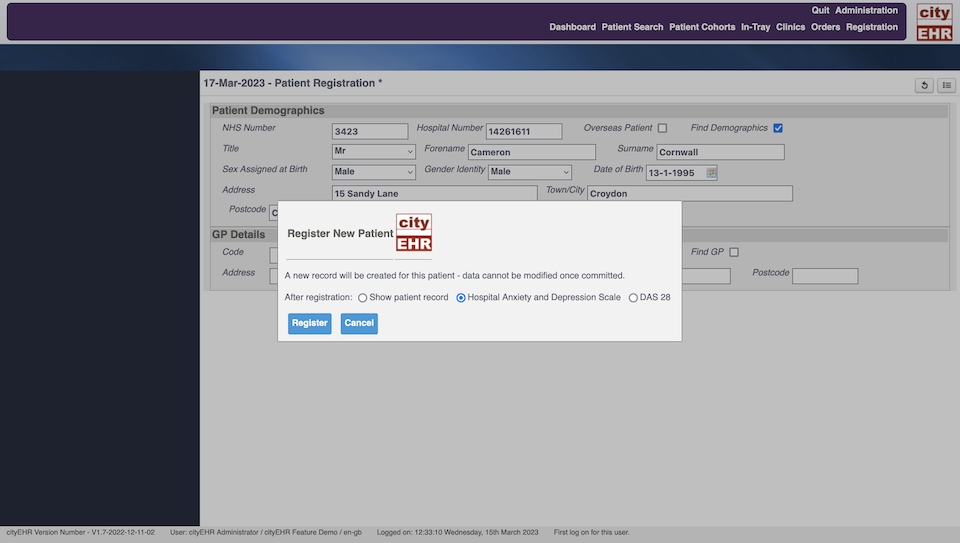
Confirmation of Patient Registration
Entering Patient Data
-
After registration, navigate to the Forms tab to access patient data entry forms. If the page does not load automatically, click the Forms tab.
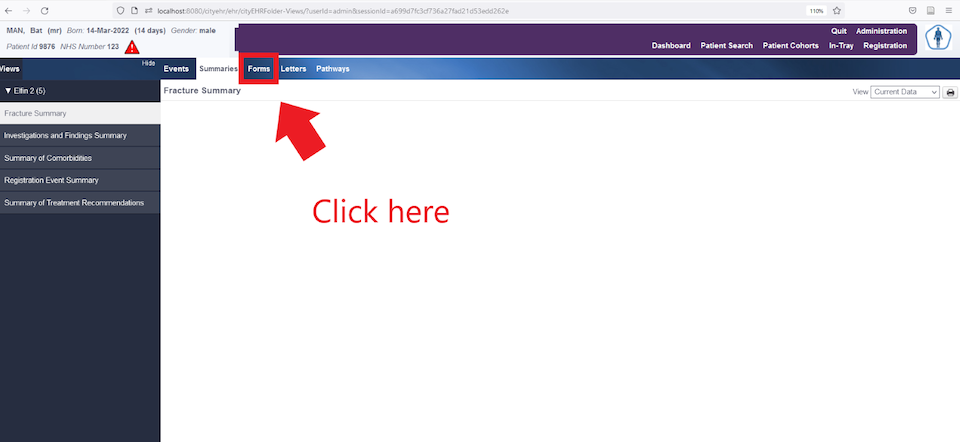
Locating Forms Page -
You will be presented with a list of new forms that can be entered for this patient. The forms are listed in various 'contexts of care' with the top category 'cityEHR Feature Demo' containing all the forms available and the others containing smaller sets of forms for Administration and for Clinical Care.
Form with Enumerated Values and Calculated Data
-
Forms can now be selected to enter new patient data. For this example the Hospital Anxiety and Depression Scale (HADS) will be used. Select the Form from the left navigation menu.
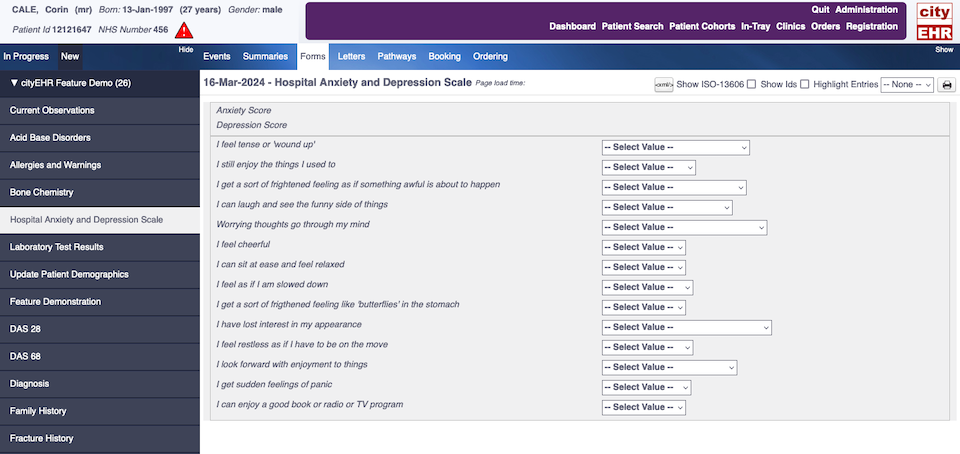
Hospital Anxiety and Depression Scale Form -
The form will load and you can now enter data into the fields by answering each question using the drop down menu selections. For this test, it doesn't really matter how you answer the questions – ensure you continue to the bottom of the page and select an answer for every question.
-
At the top of the HADS form are two calculated entries for Anxiety Score and Depression Score. These will be calculated when all the questions have been answered.
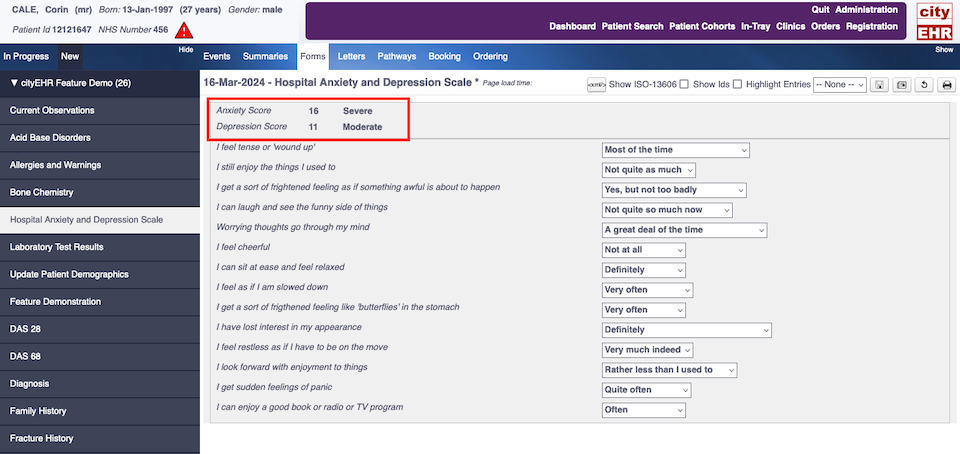
HADS Form: Anxiety and Depression Scores -
Once you have finished entering data you can Publish the form to the patient record by clicking Publish in the EHR view controls.
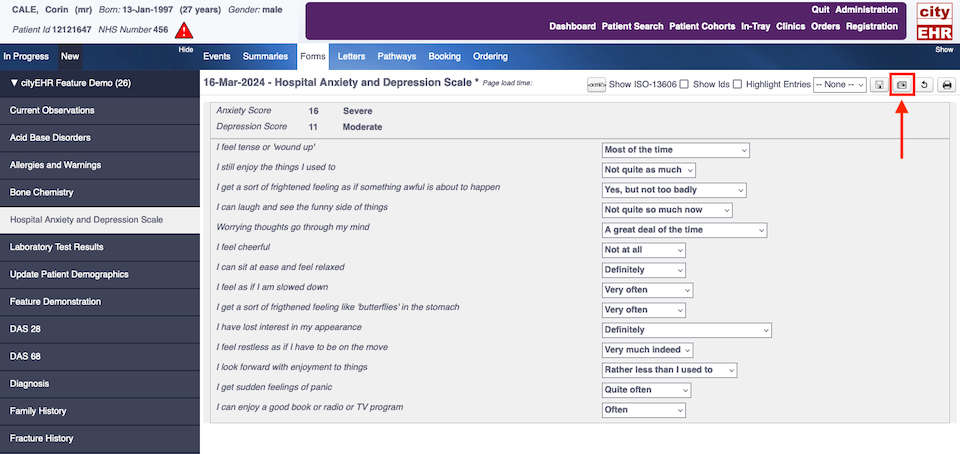
Publishing Completed HADS Form to the Patient Record -
Select the Commit Form button with the radio button Show patient record selected.
-
Once the data have been committed to the patient record you will be moved back to the patient record folder displaying a list of all data in the record for your patient, including the HADS data just completed.
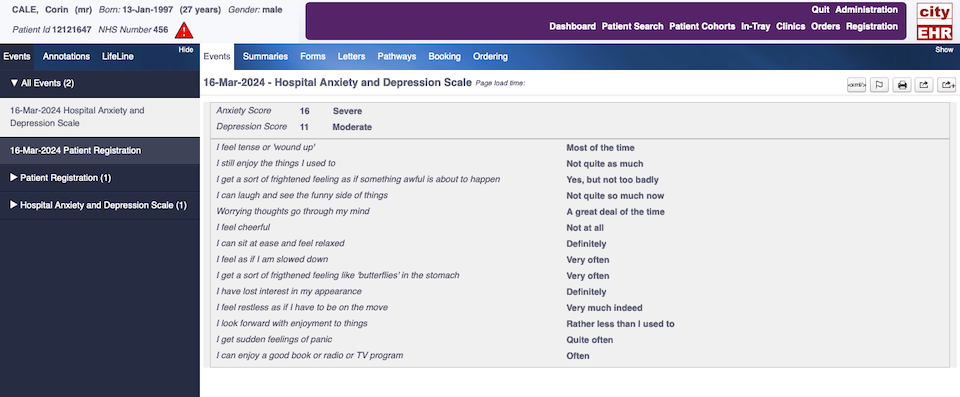
Patient Record Folder with Completed Hospital Anxiety and Depression Scale Form
Form with Graphical Data Input
-
Return to the Forms tab and select the form for DAS 28. This form records the Disease Activity Score for the patient, by selecting joints that are either tender or swollen. The input of tender or swollen joints is made by clicking on the appropriate area in the homunculus image.
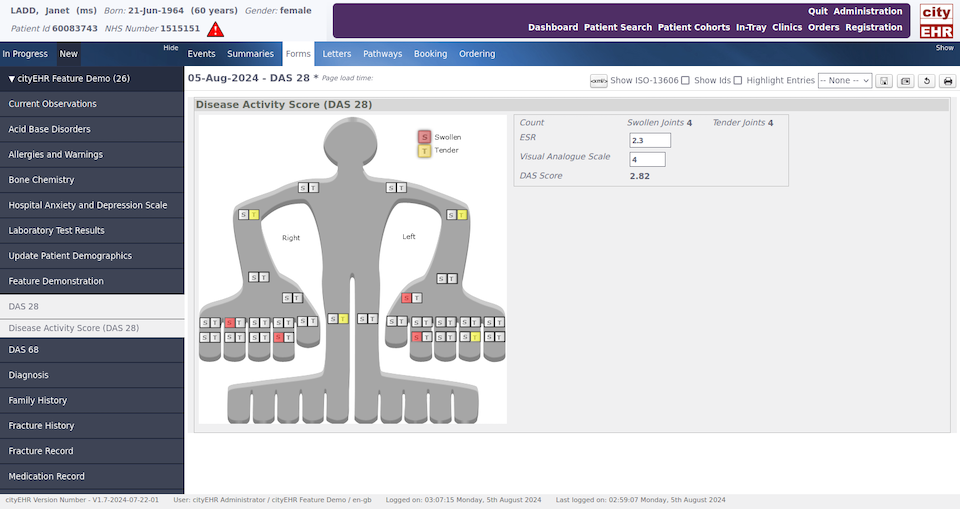
Disease Activity Score (DAS) 28 Form -
As you click to select the tender and swollen joints you will see the counts changing. Enter values for ESR (e.g. 2.3) and Visual Analogue Score (e.g. 4) and the DAS Score will calculate.
-
The DAS Score will be recalculated each time you select a tender or swollen joint or change either the ESR or Visual Analogue Score.
-
Once you have finished entering data you can Publish the form to the patient record by clicking the Publish button as before. Confirm the action and the DAS 28 data stored in the patient record.
-
Select Commit Form on the Dialogue Box that appears after clicking Publish.
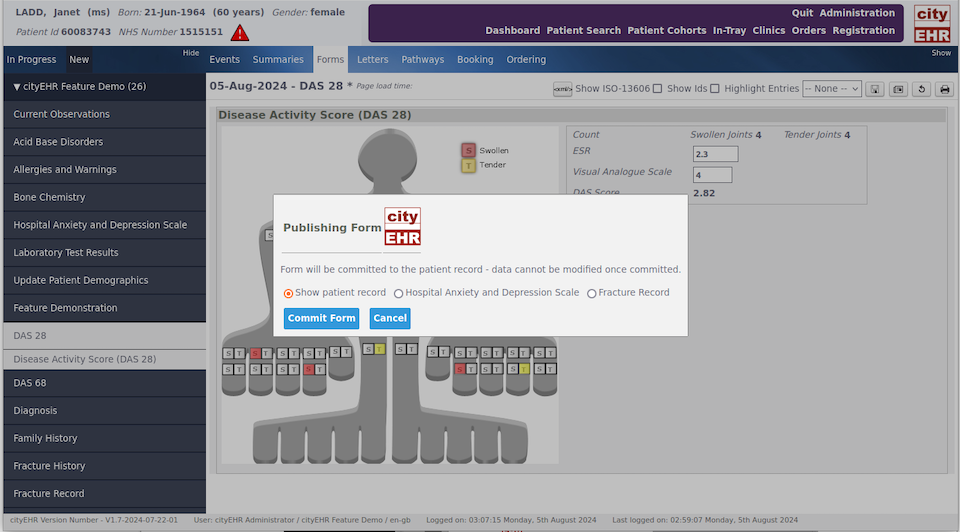
Committing Completed Disease Activity Score (DAS) 28 Form -
The patient record now displays the event, with the data you recorded.
Note: This does not include the homunculus graphics that was used for data entry.

Event Displayed in the Patient Record -
Return to the Forms tab and select the Family History form from the left navigation menu.
Note: You may need to reduce the resolution of the page to fit the display of the form shown below, or you can press the small Hide button to collapse the left hand navigation pane and give more room for the form.
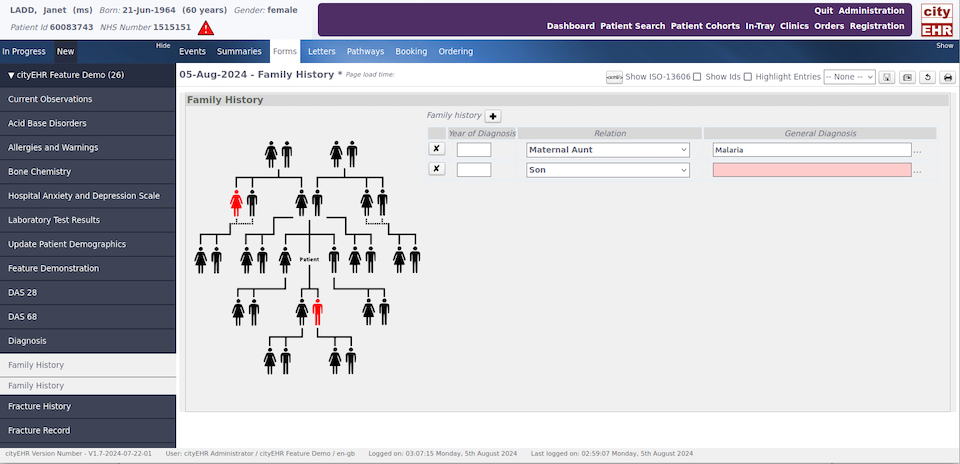
Family History Form -
This form has a representation of the family tree for the patient. Click on people icons in the image to select a family member – this will then add a new line to the list of family members where you can fill out the date and details of a general diagnosis for that person.
-
To enter the diagnosis you can either press the '...' button to the right of the empty field, or begin typing for an auto-complete of the diagnosis.
-
You can also add family members by clicking the small '+' button at the top of the family history list, or remove a family member by pressing the 'x' button next to the family member.
-
Once again, publish the form to the patient record when you are done.
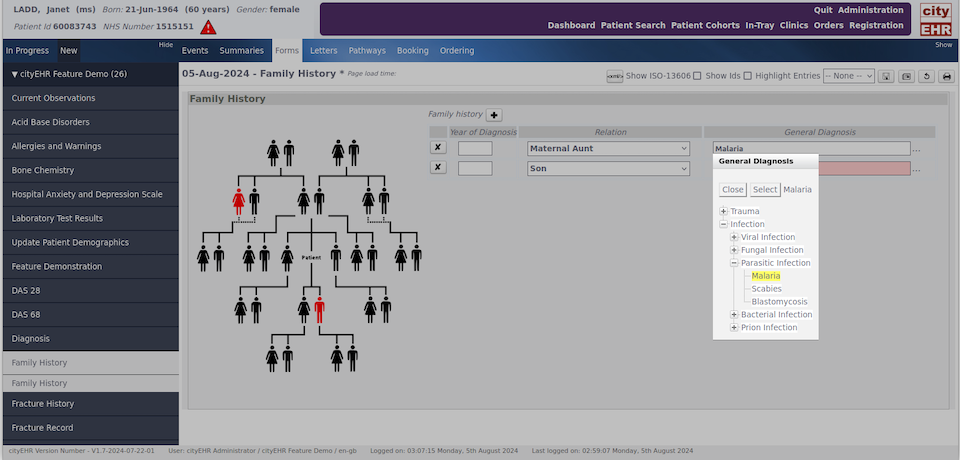
Selecting the Diagnosis from a Drop-down
Form with Sorting of Entries and Conditional Elements
-
Within the Medication Record Form, you can enter data for either Current Medications or Previous Medications by pressing the appropriate '+' button.
-
To enter the name of the medication you can either start typing in the input box, or select '…' to the right ofthe empty field, which will bring up an expandable list of medications from which you can select.
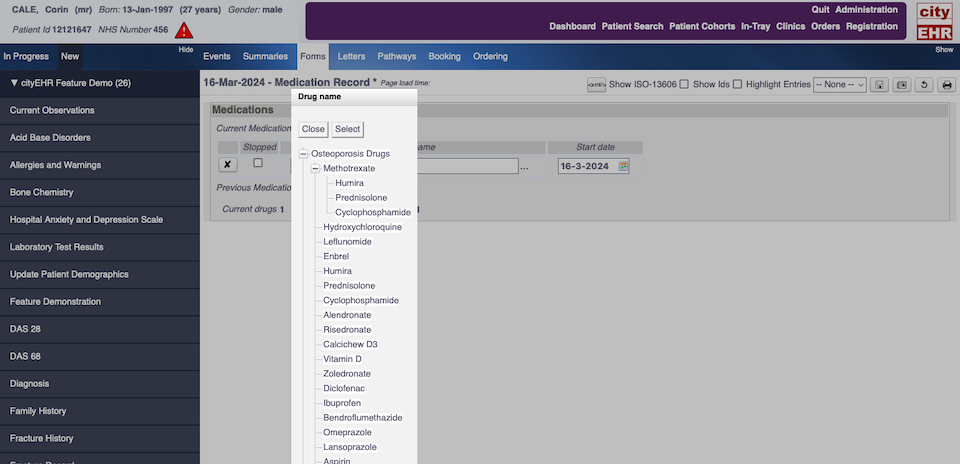
Medication Form’s Expandable List of Medications -
When typing the name of the medication you will either get a single medication filled out automatically as soon as your input matches it uniquely, or a drop-down selection of matching medications.
-
Once you've added a collection of medications, try checking or unchecking the Stopped button. When you do this, the medication will be moved between the lists for Current or Previous Medications.
-
Publish the form to the patient record when you are done.

Categorization of Current and Stopped Medications
Form with Multiple Entries, Calculations and Pre-Filled Data
-
Navigate to the Body Mass Index Form.
-
On this form you can enter a set of measurements for height and weight of the patient on various dates – the Body Mass Index (BMI) will be calculated, along with the average height and weight for the patient.
-
Publish the form.
-
Now return to the Forms tab and select the Body Mass Index form again.
-
The form will be pre-filled with the entries added in the previous step.
-
New entries can be added, however published ones cannot be removed or edited.
Note: The information model defining this behaviour can be set up to allow previous entries to be updated and/or deleted.
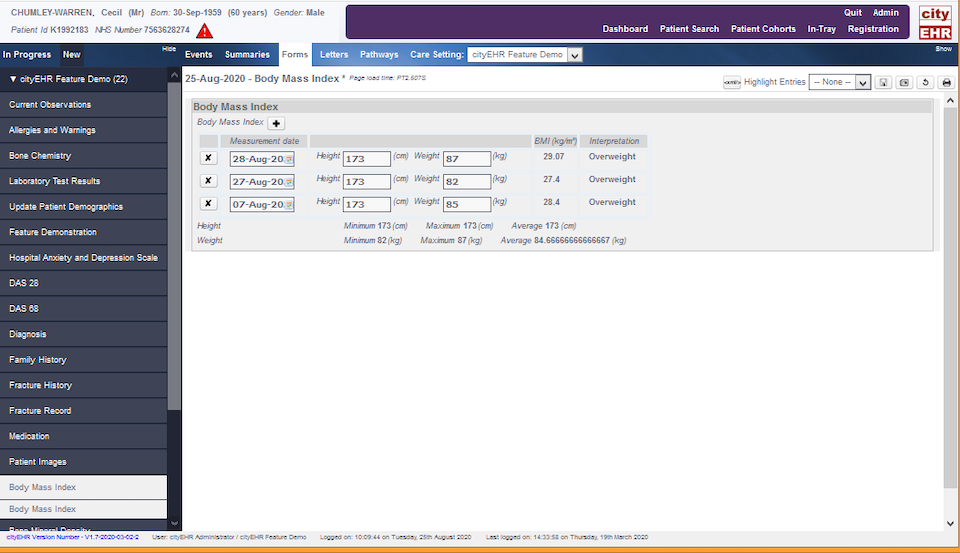
Body Mass Index Form with Calculations
Form with Enumerated Class and Supplementary Data
-
Navigate to the Diagnosis Form.
-
Press the '+' button to add a new diagnosis.
-
Select '...' to browse avaliable diagnoses or use the auto-complete (e.g. type sw...)
-
Depending on the diagnosis you select, you may see an additional SDS to the right of the diagnosis once it is selected.
-
Select this button to see the Supplementation Data Set dialogue.
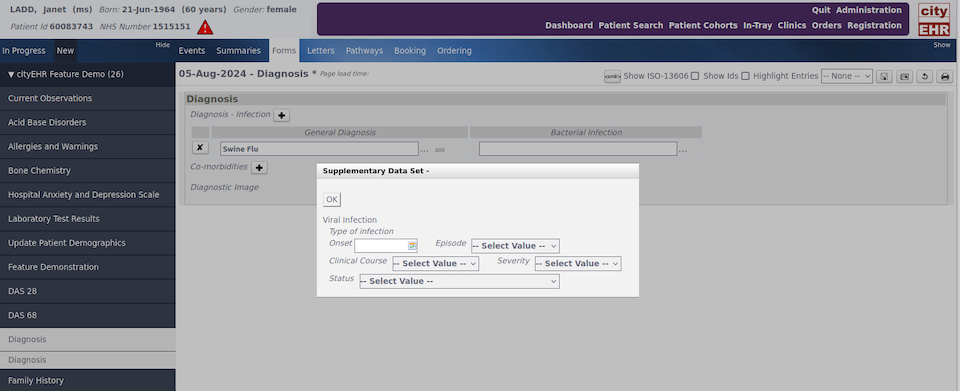
Entering a Supplementary Data Set -
Complete the required data for the dialogue box and select OK when completed.
The supplementary data is displayed next to the diagnosis it is associated with.

Display of Supplementary Data Set -
Now add a diagnostics image by selecting the Browse button from Diagnostic Image.
-
Navigate to a file on the file system to upload that image to the record.
Note: The image is stored directly in the current composition when it is committed to the patient record – this feature is designed for informal images as the type that might be capture in a mobile phone, not full diagnostic images capture using some imaging modality – any such images would be managed in the PACS, not the EHR.
-
Once the image has been uploaded it is displayed inline on the form.
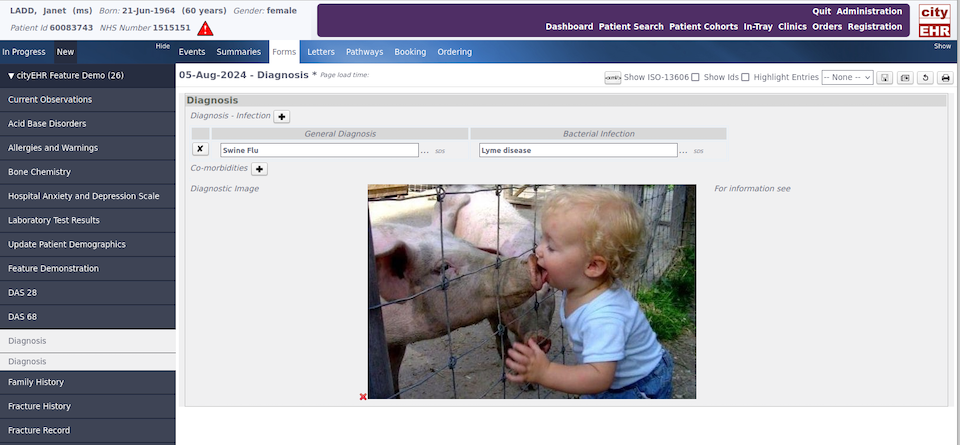
Diagnostic Image Uploaded from the File system -
Select the Publish to commit the form to the record and navigate to the patient Events.
-
The data recorded in now saved and displayed in the patient record, including the uploaded image.
Finding Patients
Once patients are recorded in your database, you can search for them and select the desired patient to view their record or input data.
-
Click the Patient Search button in the purple system navigation pane at the top of the page to open the search form, as shown below.
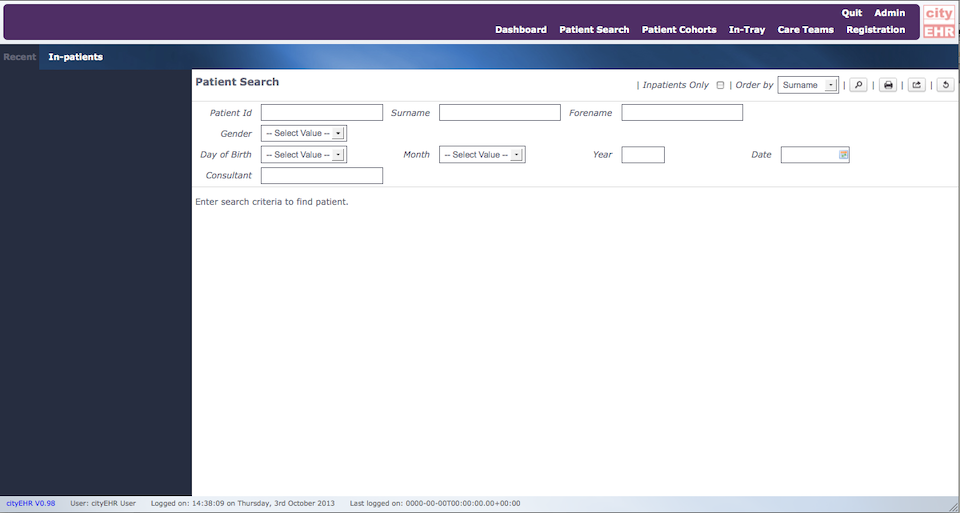
Patient Search Form -
Enter your search criteria and click the Search button at the top of the form. You can also press Enter after typing in any text input field. Hovering your mouse over the button will display its name.
-
For test patient data, try searching using a common letter in the surname or a patient identifier. For example, entering "K" may return results if the default format for patient identifiers was used when generating the test data.
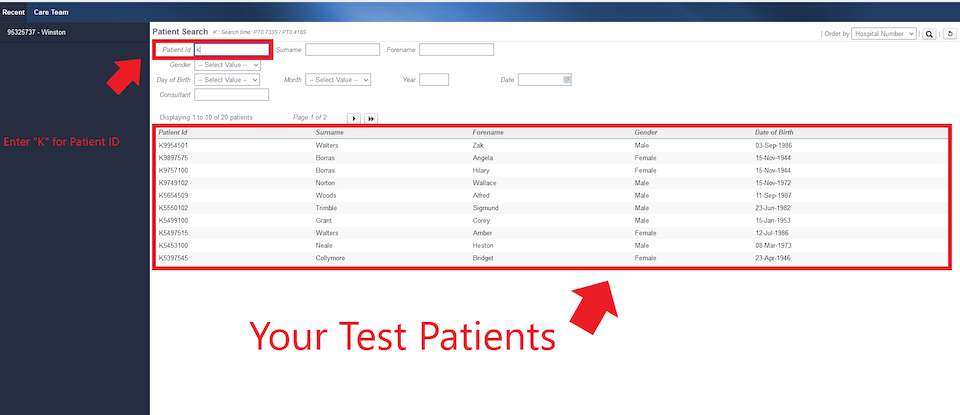
Searching Patients with Patient ID using “K” as a Patient Identifier -
The search results will display basic demographic details of matching patients:
-
If no results are found, a notification will appear.
-
If too many patients match your criteria (e.g., searching for "Male"), you’ll be prompted to enter more specific search criteria.
-
-
When patients are found, the list will display even if only one result matches. This allows you to confirm the correct patient before viewing their record.
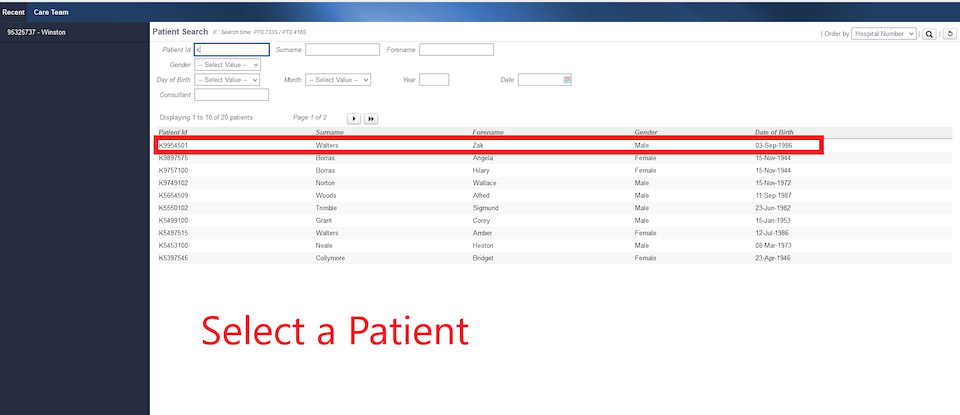
List of Patients Found Using Patient Search -
Click a patient from the list to access their default summary view. This view includes features for reviewing, charting, and annotating the record. The next exercise will guide you through these functionalities.